

We are releasing this update on Oct 2, 2025.
We've made it easier than ever to manage your automated customer communications, giving you more control and flexibility than before. This guide will walk you through what's changed and how to set up your first workflow on your OpoShop.
What Are Workflows?
Workflows are your central hub for creating powerful, automated email sequences that engage your customers at just the right time. We've migrated many of your existing automated messages, such as transactional emails and welcome series, into the new Workflows section.
This means emails like Order Updates and Abandoned Cart series are now fully customizable. You can now change the timing, add more emails, and set specific conditions—things you couldn't do before.
Note: We have converted the abandoned cart/checkout to workflows, so you will no longer see them in transactional section.
Every new OpoShop store comes with three pre-built workflows to help you engage customers from day one:
- Abandoned Cart
- Abandoned Checkout
- Welcome Email
These workflows are fully customizable and available to all users. You can edit their triggers, emails, timing, and other settings to match your business needs.
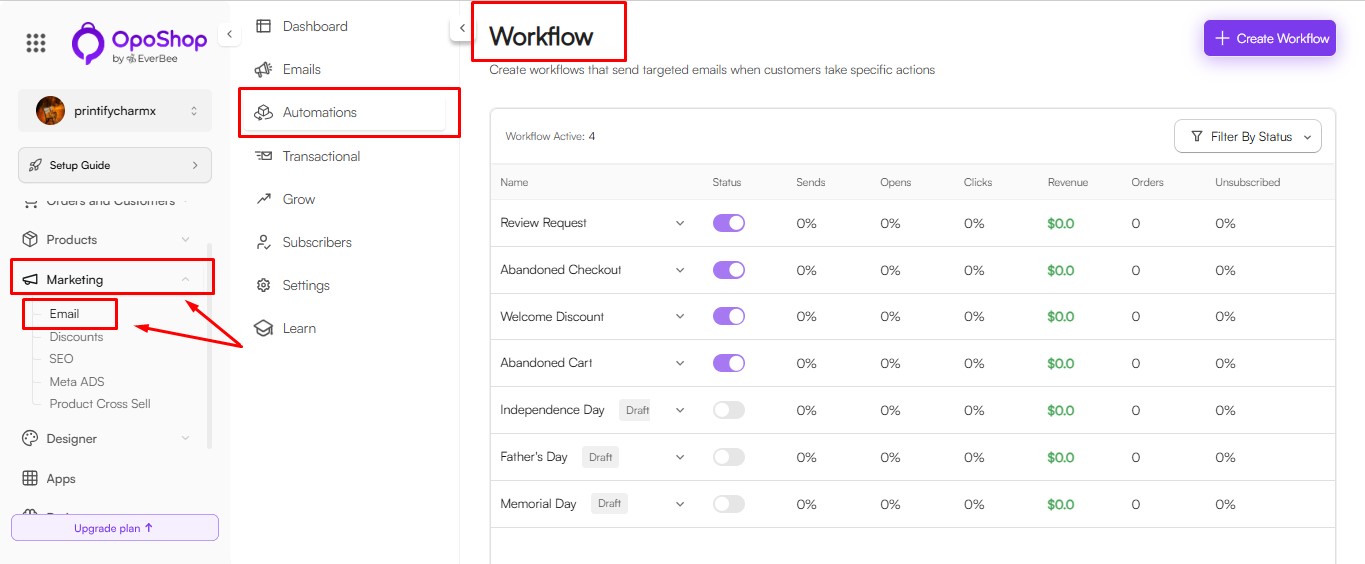
Step 1: Accessing Your Workflows
To access your email automations:
- Go to Marketing > Email.
- Open the Automations or Workflows section.
- Select an existing automation (such as Abandoned Cart) or create a new workflow.
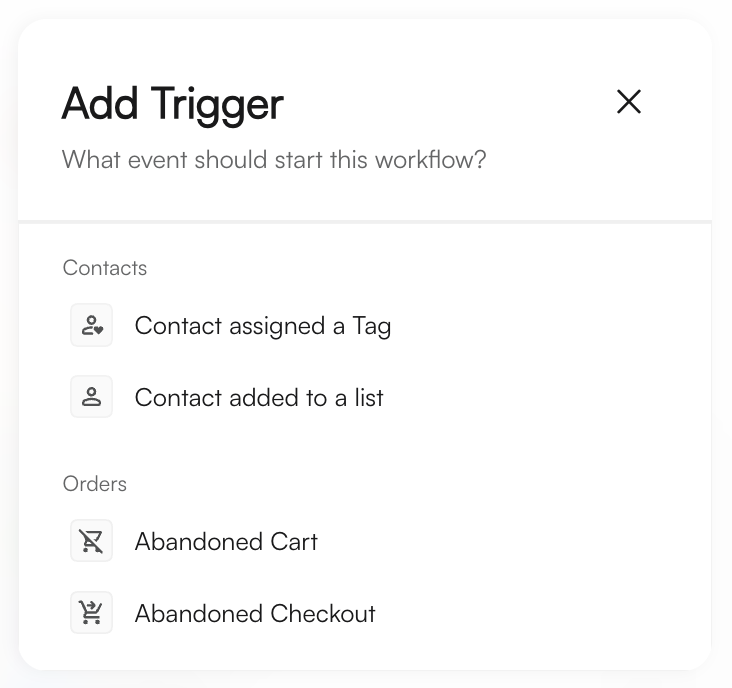
Step 2: Understanding the Trigger
Every workflow begins with a Trigger, which is the event that automatically starts the automation for a customer.
For example, in an Abandoned Cart workflow, the trigger is activated when a customer leaves items in their shopping cart without completing the purchase.
The Trigger block is the starting point of every workflow. To configure its settings, select the Trigger block.
Step 3: Customizing the Flow with Building Blocks
You can build and customize your flow using three main building blocks:
A. Add an Action (Sending Emails or Managing Subscribers)
Actions define what happens after a trigger, time delay, or conditional split in your workflow.
To add an action:
- Select the + button to add a new step.
- Choose Action.
- Select one of the following options:
- Send Email – Send a specific email as part of your workflow.
- Add/Remove Subscriber – Add a customer to a subscriber list or remove them for more targeted email campaigns.
B. Add a Conditional Split
A Conditional Split lets you create different workflow paths based on specific customer conditions, allowing you to send more targeted emails and actions.
To add a conditional split:
Select the + button to add a new step.
Choose Conditional Split.
- Define a condition, such as:
- Cart Value is greater than $100
- Product X is in the customer's cart
The workflow will automatically create two paths:
- Yes – For customers who meet the condition.
- No – For customers who do not meet the condition.
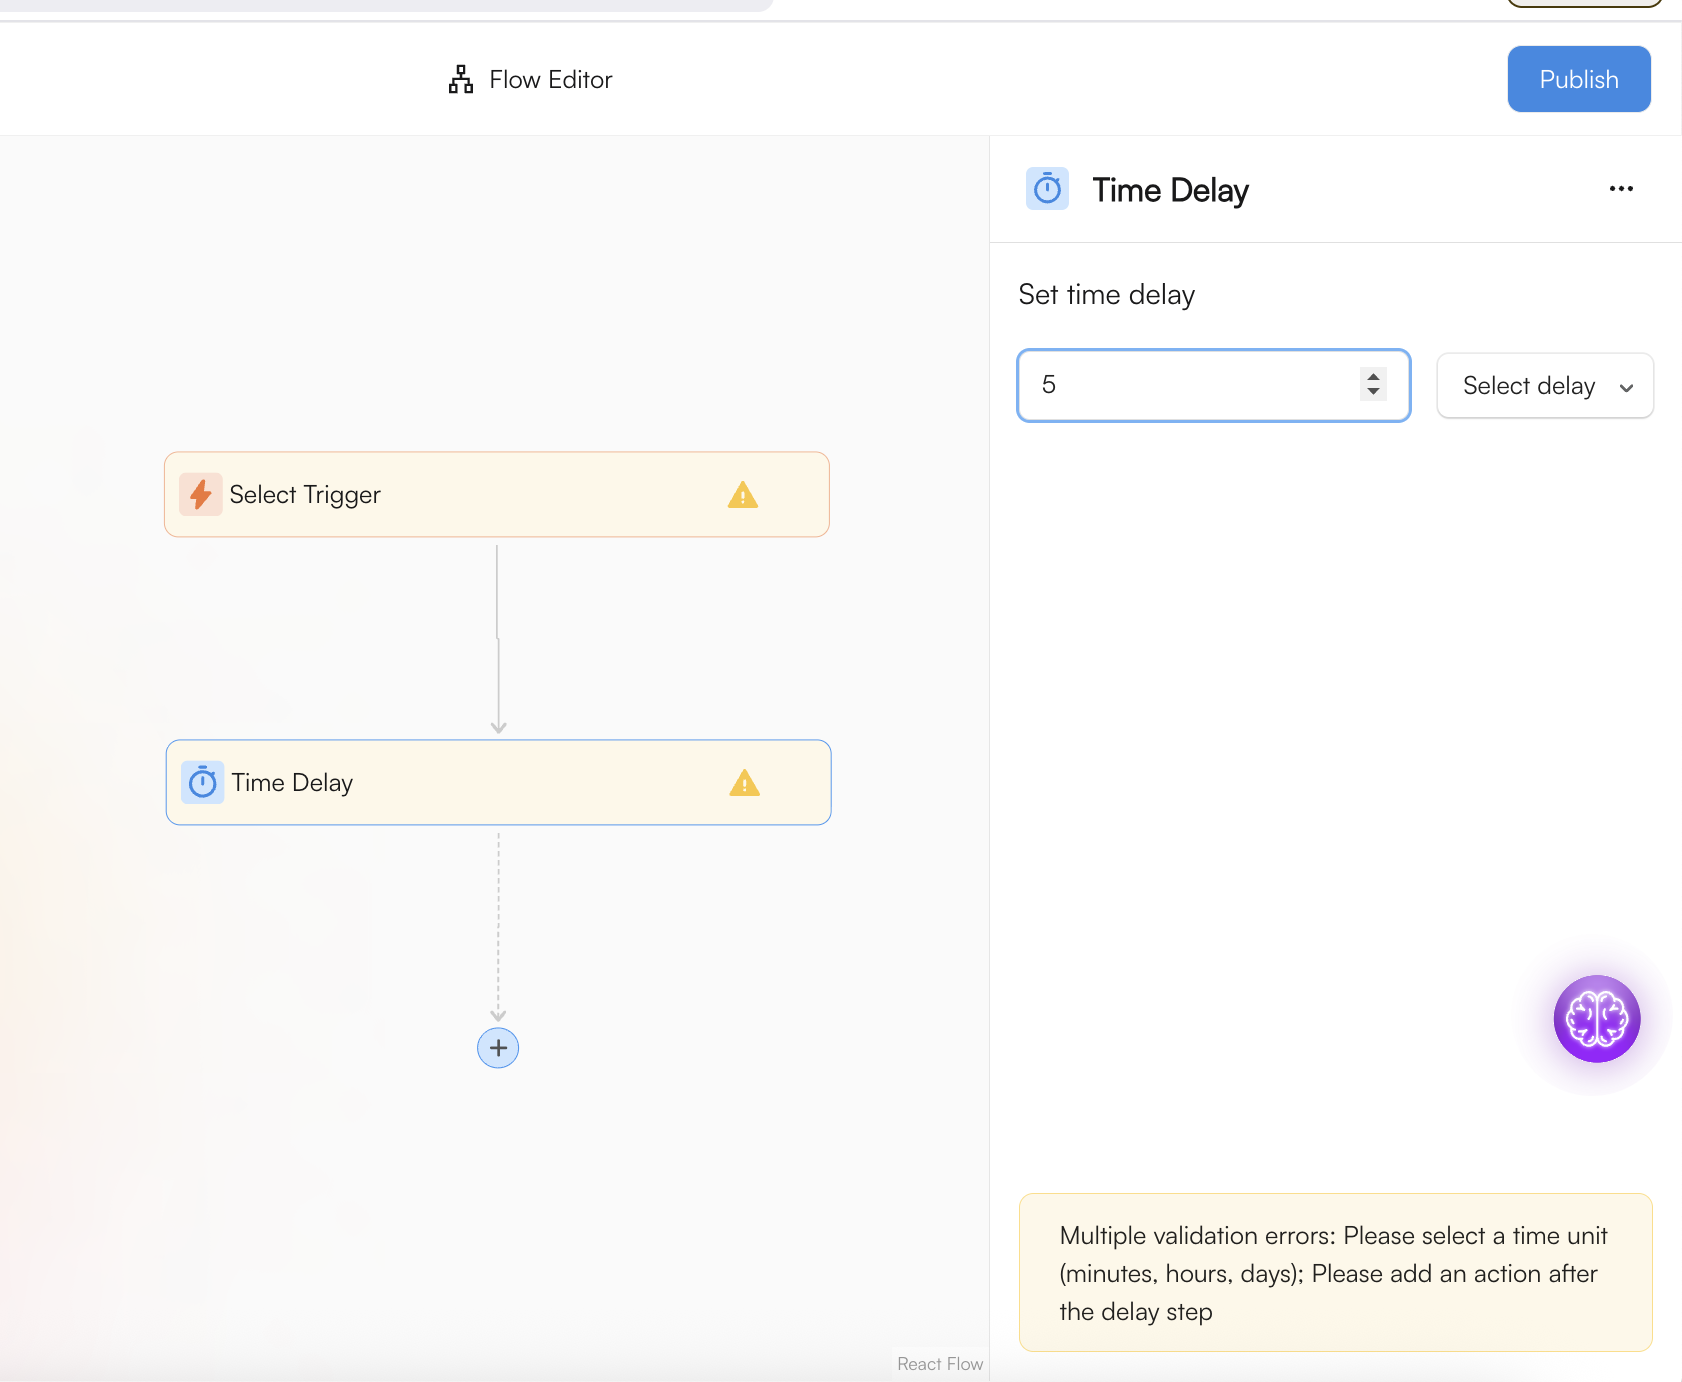
C. Add a Time Delay
A Time Delay adds a pause between workflow steps, allowing you to control when the next email or action is triggered.
To add a time delay:
- Select the + button to add a new step.
- Choose Time Delay.
- Set the delay length, such as 1 hour or 3 days, before the next step is executed.
Step 4: Activating Your Workflow
Before a workflow can start sending messages, you need to enable it!
- Once you are done making changes, look for the Publish or Activate button.
- Any changes you make must be published for them to go live in your store.
Note: Workflows can be easily activated or deactivated at any time to pause or resume your automated campaigns.