Set Up Business Accounts
Create a Business Manager account on business.meta.com.
Add your website domain and verify it in Business Settings → Brand Safety → Domains.
Connect assets: Add your Facebook Page and Instagram account to Business Manager.
Setting up Meta Ads
Before starting, ensure at least 5 products are included in your store’s catalog.
Step-by-step Instructions:
Go to business.facebook.com → All Tools.
Open Ads Manager.
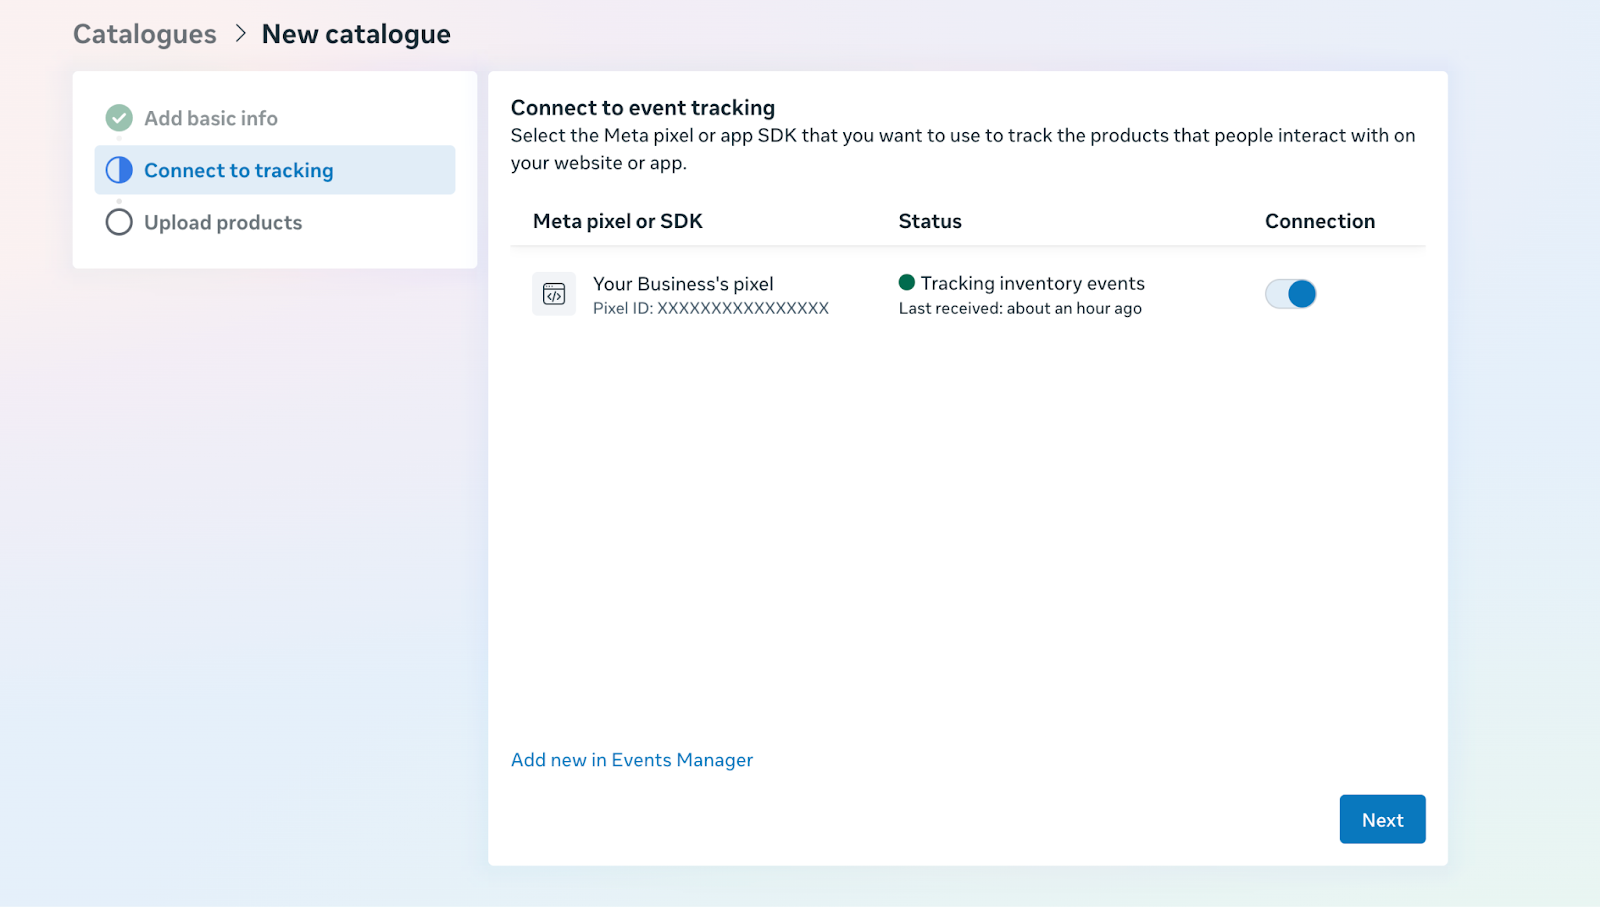
Navigate to Events Manager → Data Sources.
Copy your Pixel ID:
Find your pixel under Data Sources.
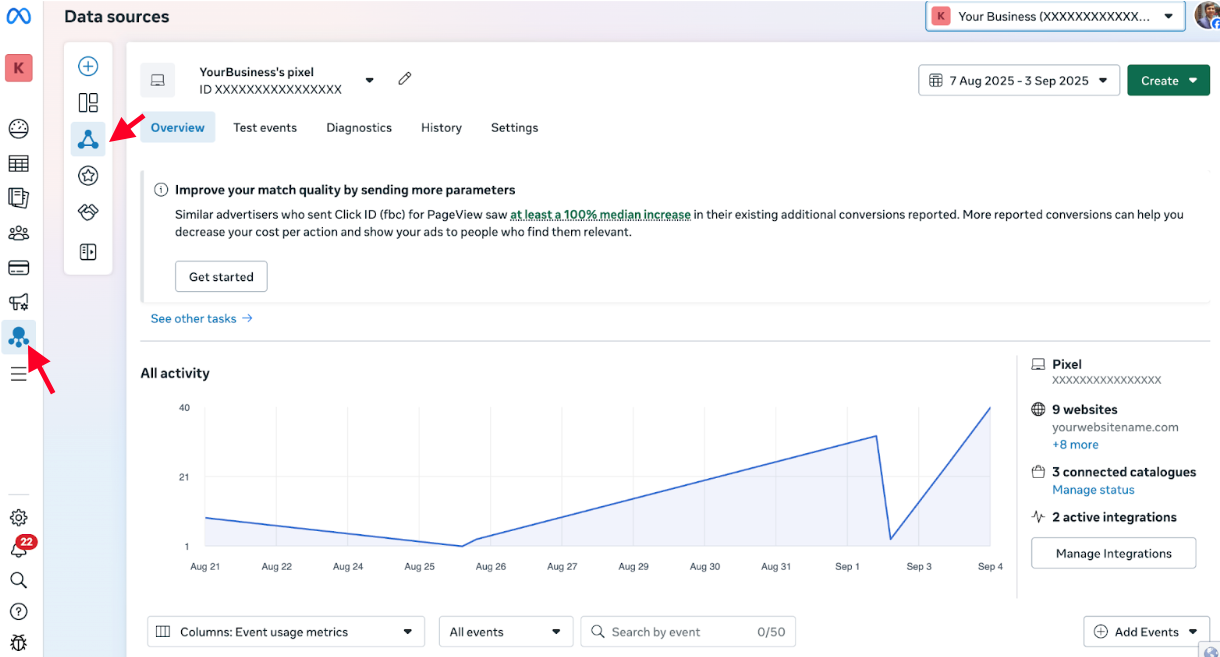
Copy the Pixel ID.
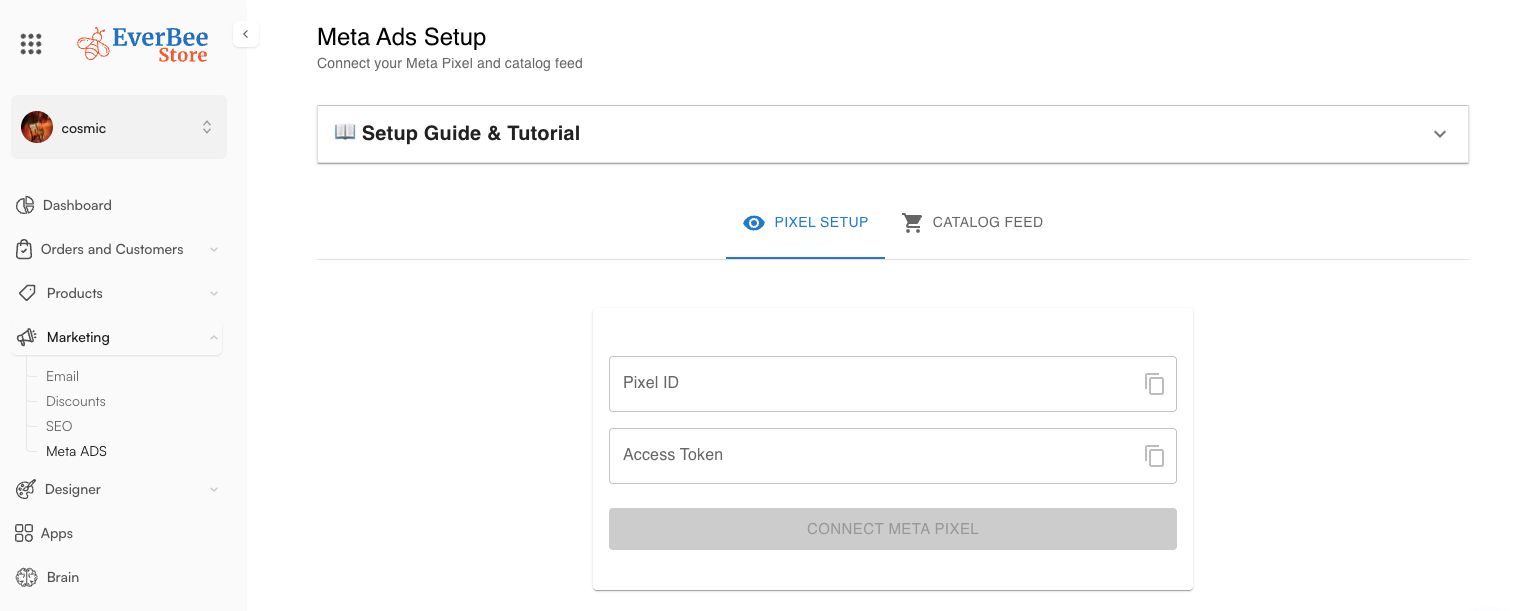
Go to Store → Marketing → Meta Ads and paste it.
In Events Manager, go to Data Sources → Settings.
Scroll down to Setup direct integration.
Ensure Setup with Dataset Quality API is selected (usually pre-selected).
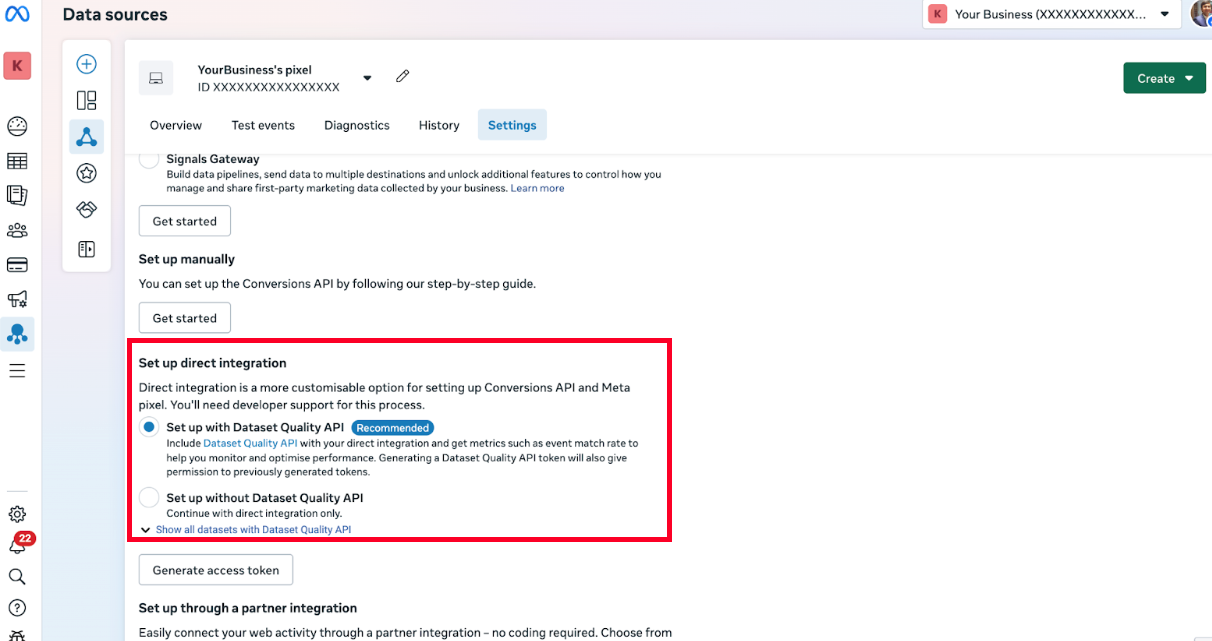
Click Generate Access Token to display your unique code.
Copy this token and paste it into Store → Marketing → Meta Ads under Access Token.
Submit both the Pixel ID and Access Token.
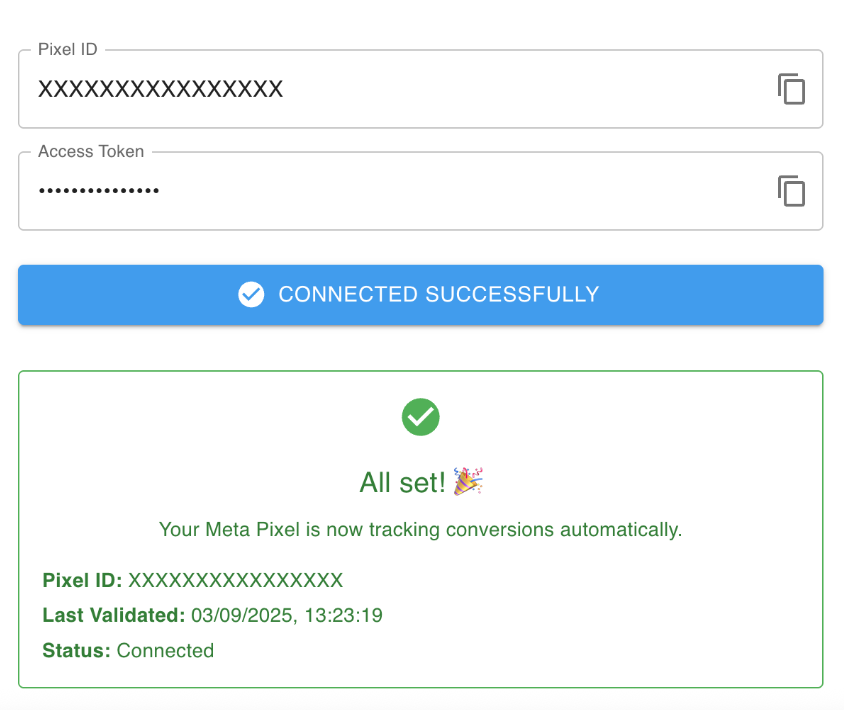
⏳ Note: Events may take 15–20 minutes to appear after being triggered.
Events Tracked
Once configured, the following key e-commerce events will be tracked:
View Shop Page
View Product Description Page
Add to Cart
Go to Checkout Page
Enter Payment Details
Place an Order
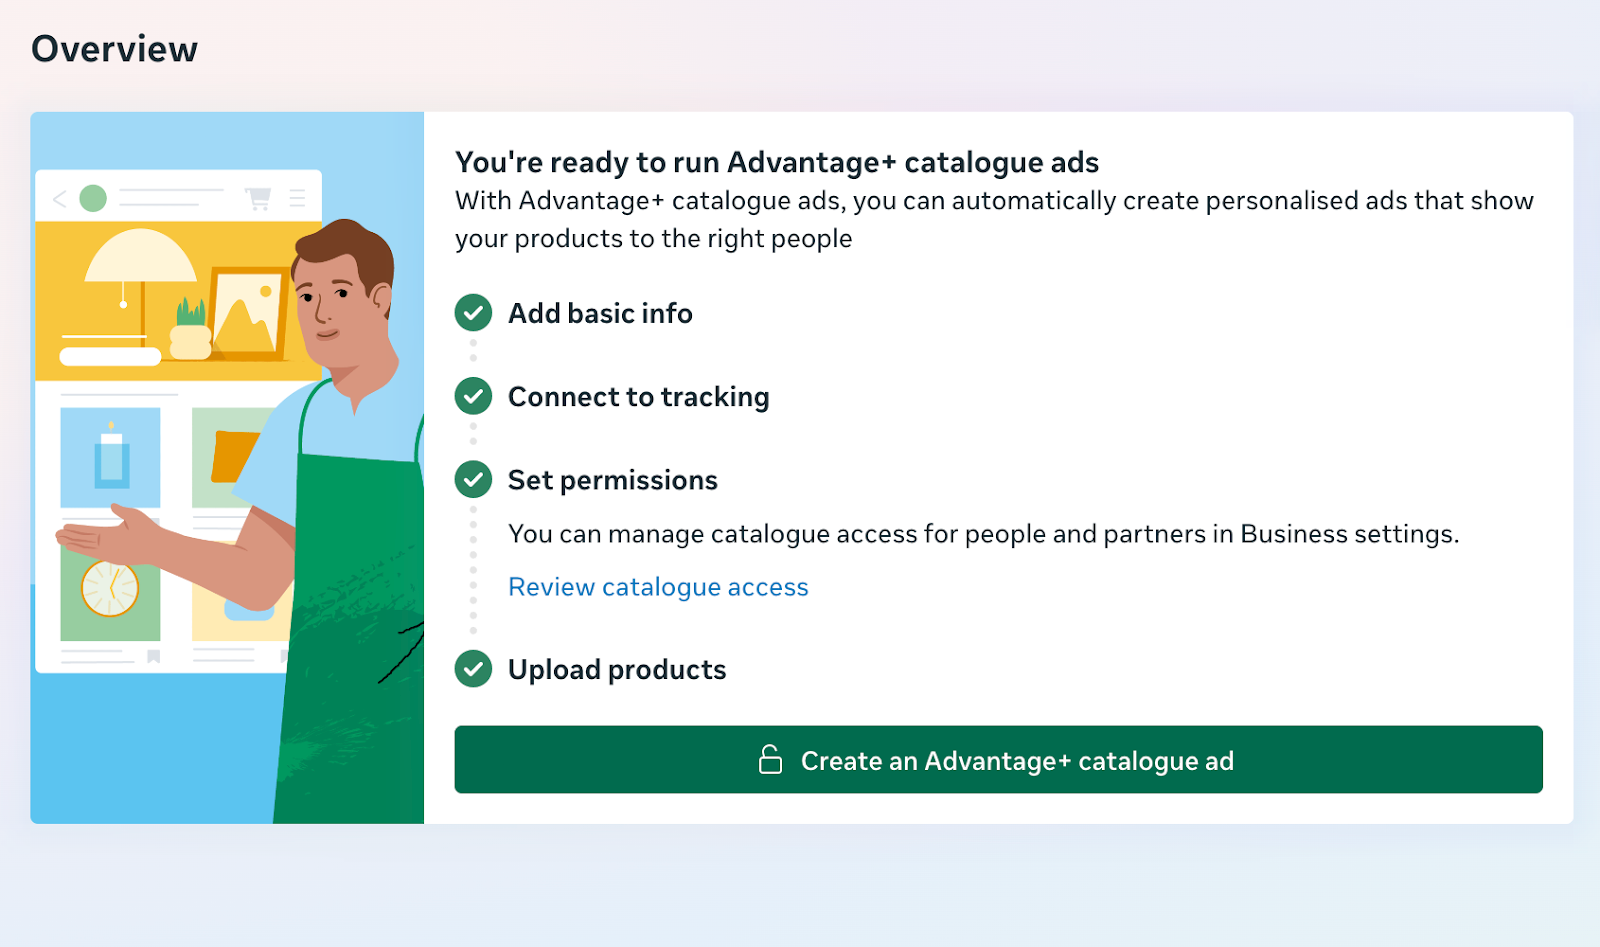
2. Setting up Catalog Ads
Catalog ads allow you to automatically create ads from the latest products in your catalog.
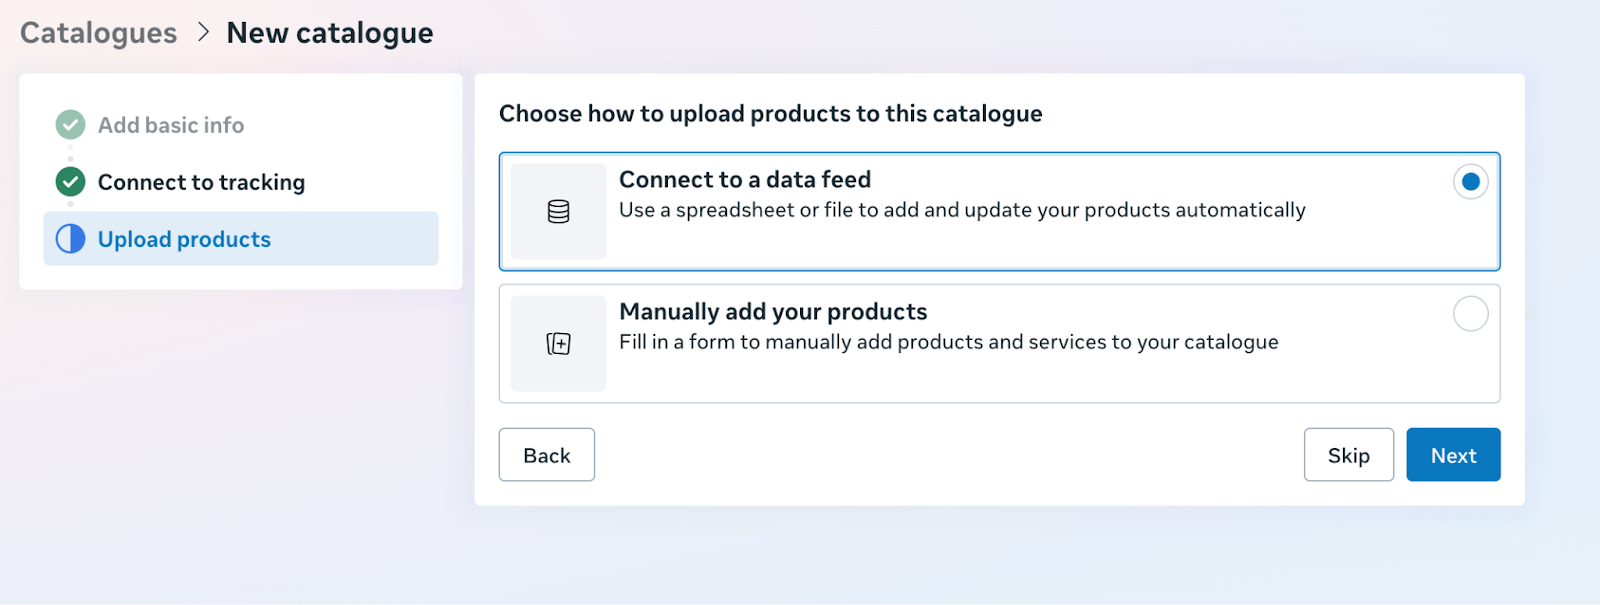
Step-by-step Instructions
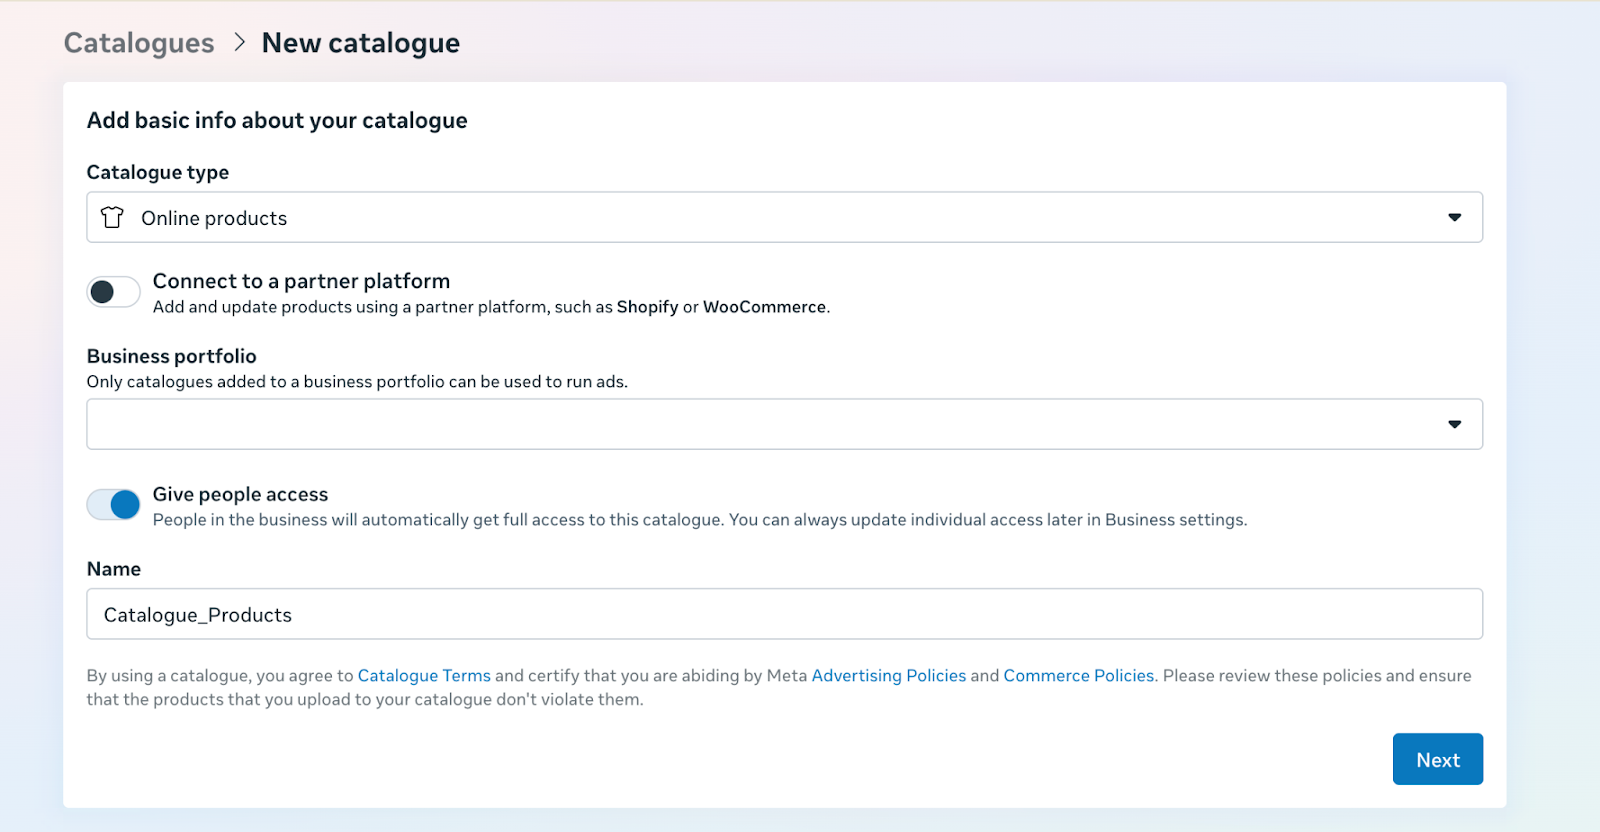
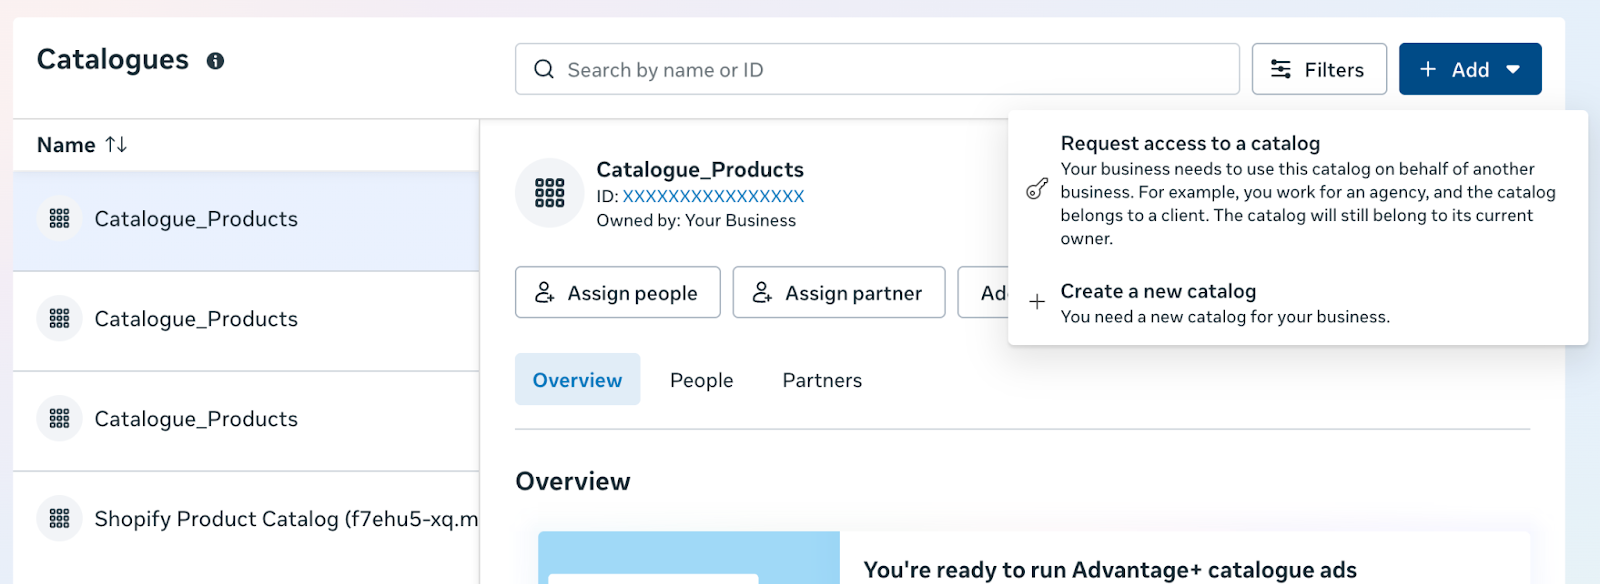
Navigate to Settings → Data Sources → Catalogue.
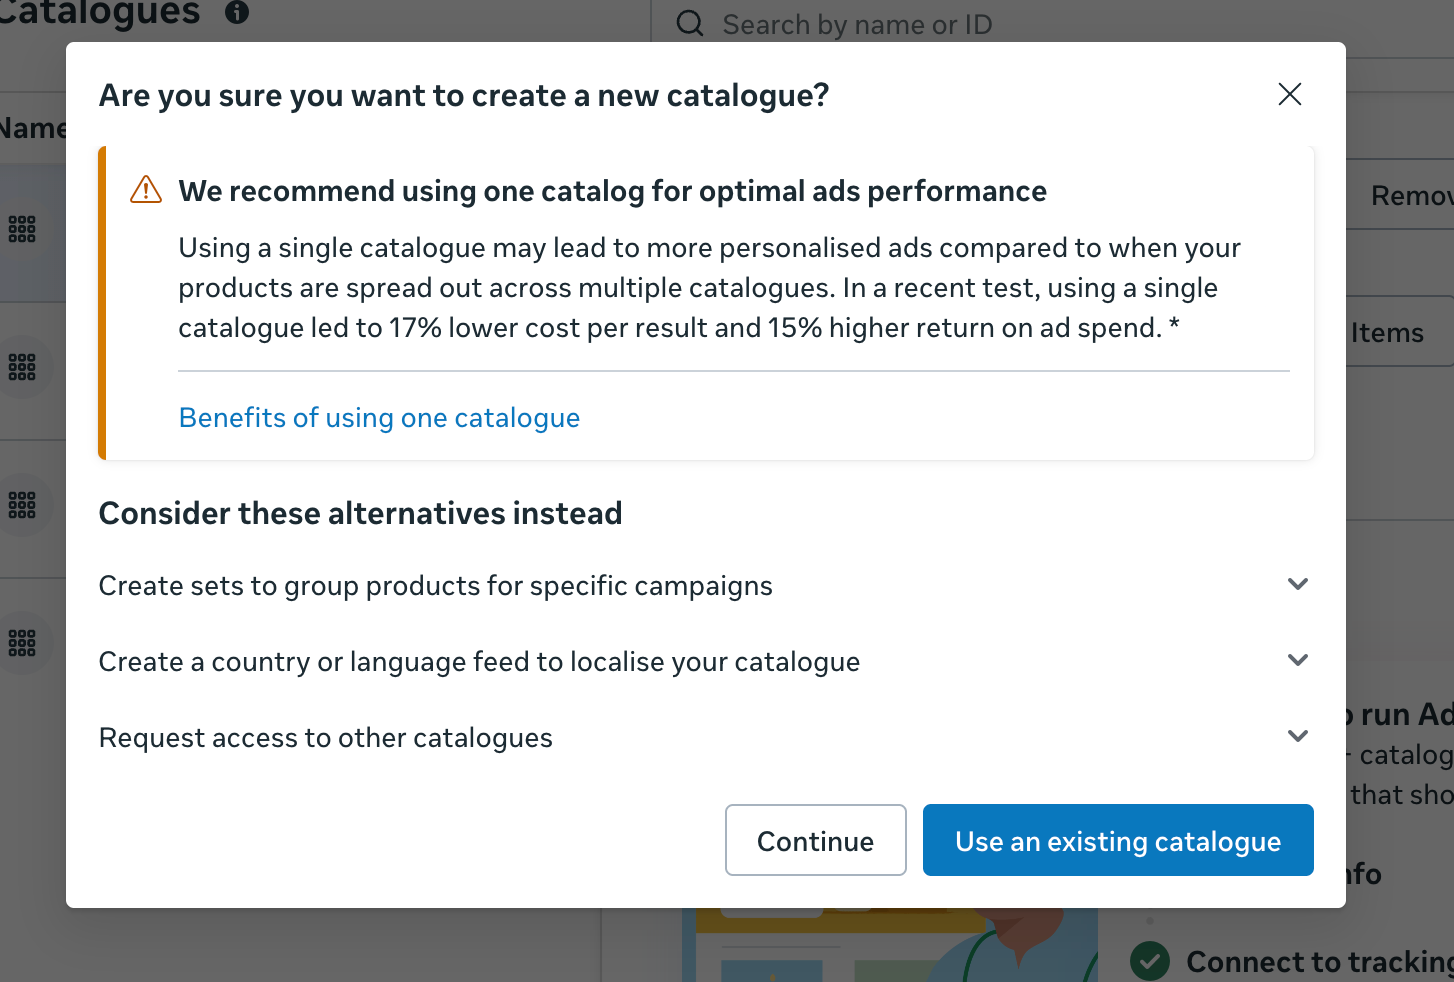
Click Add → Create a new catalog.
Click Next to proceed.
Click Next (partners option will not apply).
Click Next again for Tracking Events.
Select Connect to Data Feed.
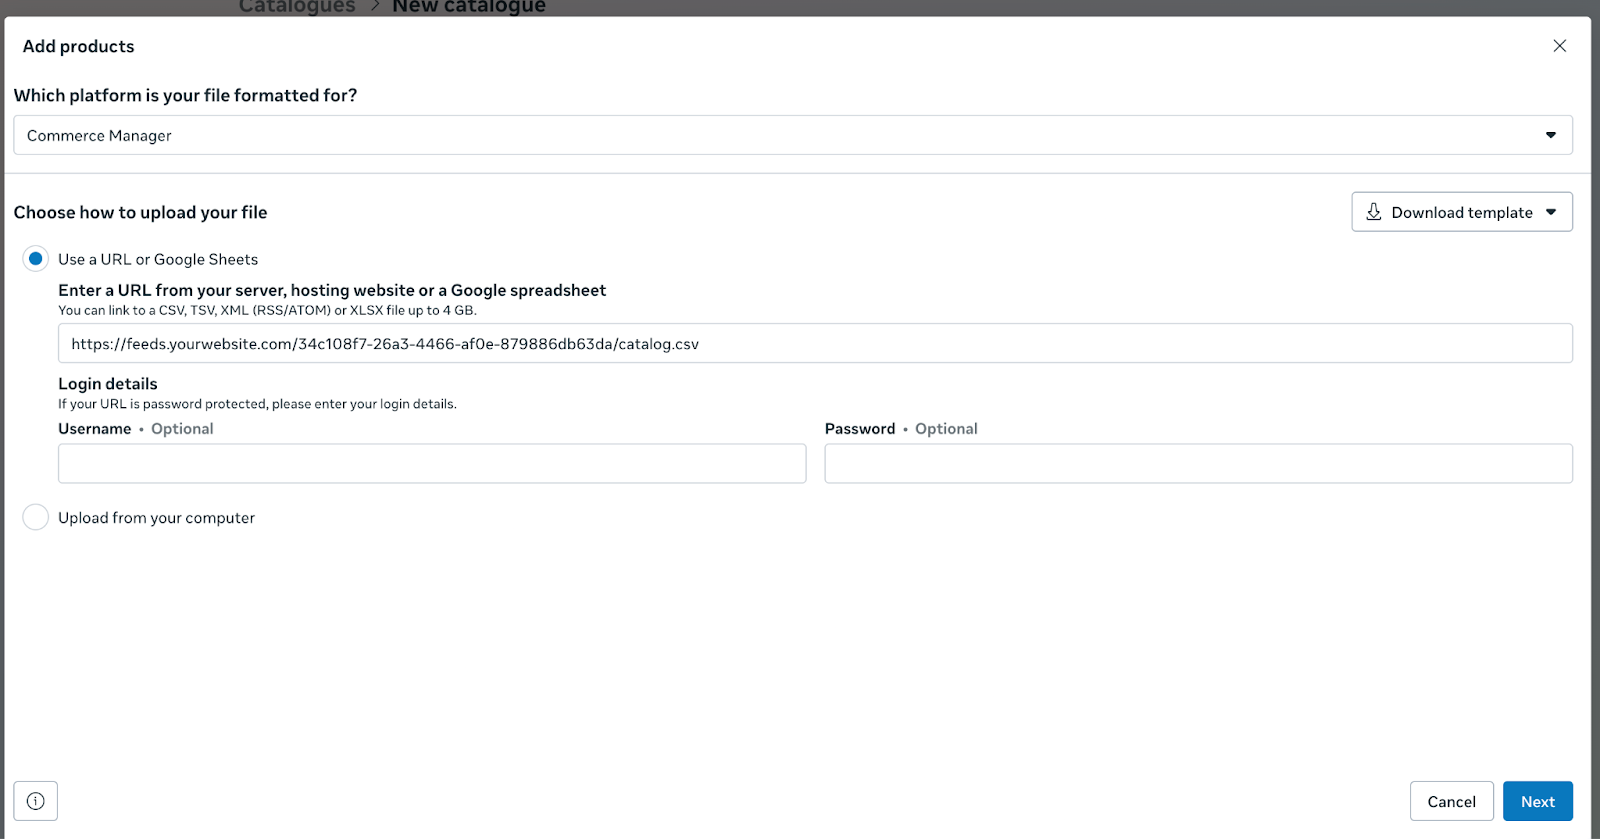
Copy the Catalog Feed URL from Store → Marketing → Meta Ads → Catalogue.
Paste the URL into the Data Feed Setup section.
Confirm settings and click Upload.

✅ Your products will now upload and display automatically in your Meta Ads.
✅ YOU DID IT! Your products will now upload and display automatically in your Meta Ads.