

A custom domain gives your OpoShop brand consistency and professionalism. It replaces the default .myeverbee.com URL, making your store's web address simpler and more memorable. For example, www.yourshop.com.
Step 1: Choose and Set Up Your Domain
- Register a domain through a provider like GoDaddy, Namecheap, or Cloudflare.
- Log in to your domain provider’s dashboard and find the DNS settings panel.
Step 2: Add a Custom Domain in the OpoShop
- Open your EverBee dashboard.
- Navigate to Settings > Domains
- Click on Connect domain.
Step 3: Configure DNS Records
In your domain provider's dashboard:
- Add an A record pointing to the IP address specified by OpoShop. This will be displayed on your side pane.
- Follow the instructions on your screen
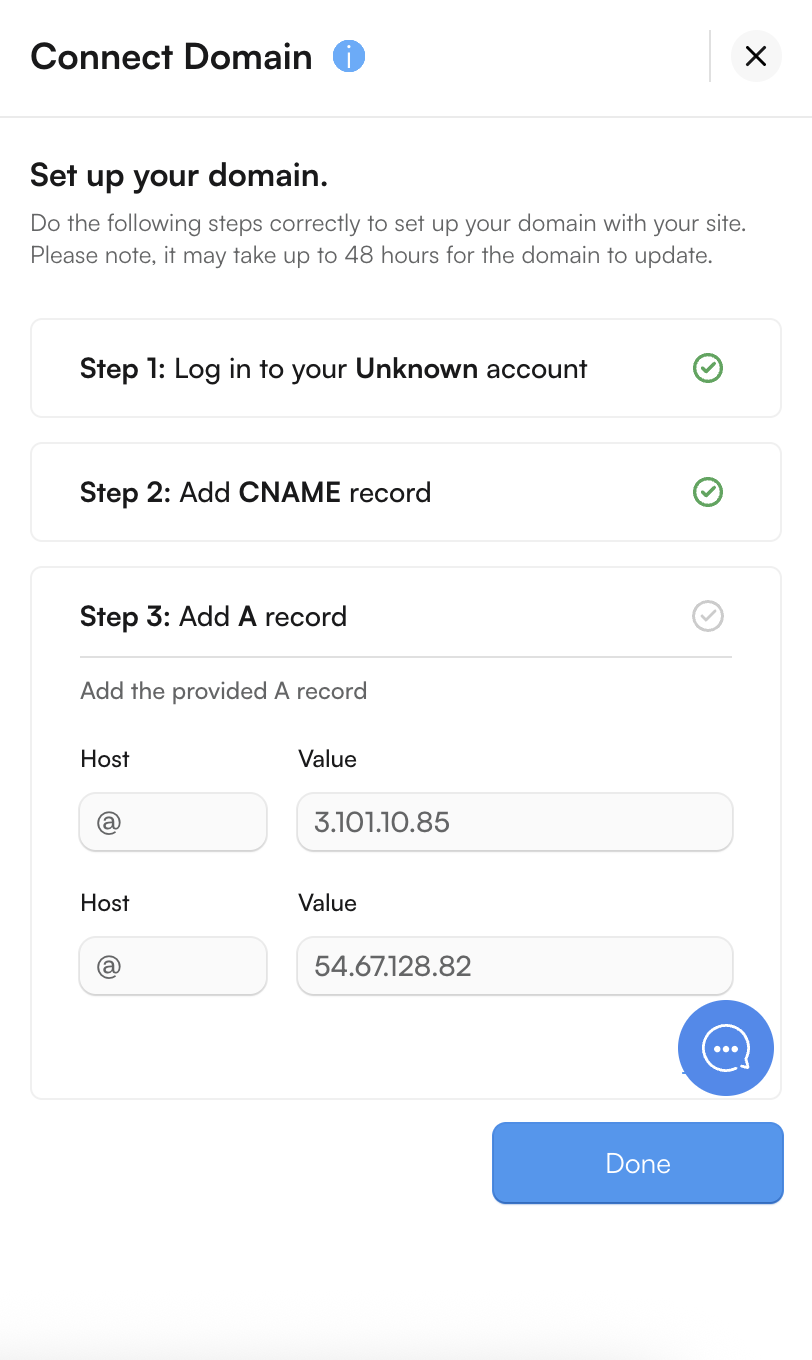
Important: Be sure to only have a single A record for the domain or subdomain. Multiple A or AAAA records can cause setup issues.
Step 4: Wait for DNS Propagation
DNS changes can take time. Anywhere from a few minutes to 48 hours for the new domain to start working across the internet.
Step 5: Set Up Google Indexing (Optional but Recommended)
Once your custom domain is live, tell Google to index your store. Learn more here.