

The Store Settings section lets you configure the core settings for your OpoShop. It is organized into five main categories, making it easy to manage every aspect of your website:
- General – Configure your business information, account settings, and regional preferences.
- Domain – Connect and manage your custom domain.
- Payment & Tax – Set up payment methods and configure tax settings.
- Shipping – Manage shipping options, rates, and delivery regions.
- Advanced – Configure integrations, custom scripts, and other advanced store settings.
Each category is designed to help you customize and manage your store efficiently from one central location.
General
The General tab contains your store's essential information and site-wide settings. From here, you can manage your business details, branding, account information, and the regions where your store operates.
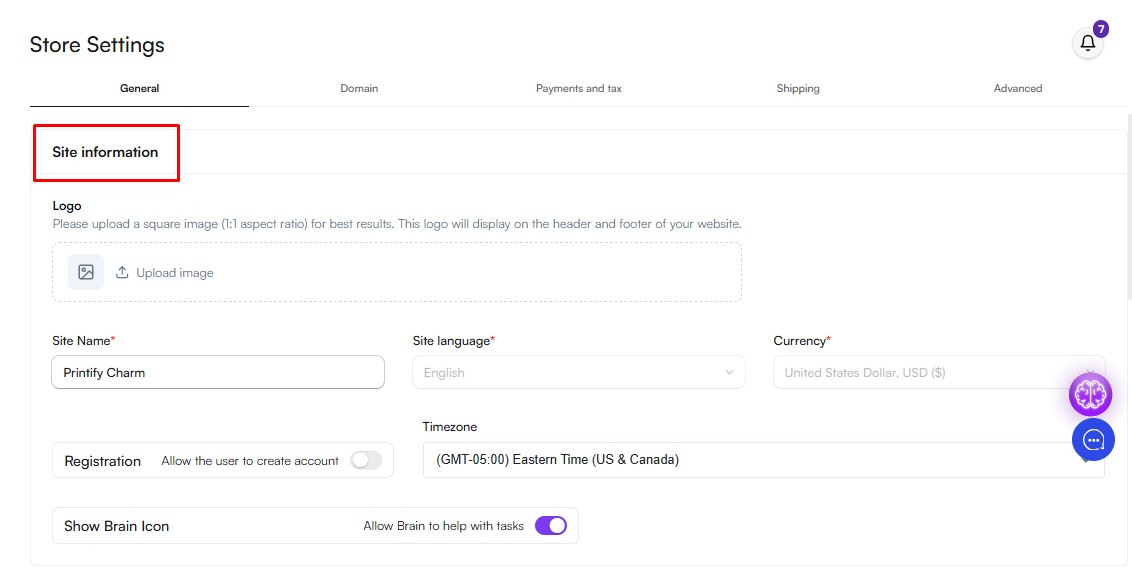
- Site Information
The Site Information section lets you configure your store's basic identity and localization settings.
You can manage the following:
- Site Name – Set the name displayed for your online store.
- Language – Choose the default language for your website.
- Currency – Select the default currency used to display product prices.
- Website Logo – Upload your store's logo to reflect your brand identity.
– Use a square image (1:1 aspect ratio) for the best display quality.
- Customer Registration – Enable or disable customer account registration, allowing shoppers to create an account on your website.
- Timezone – Set your store's timezone to ensure dates, times, and scheduled events are displayed correctly.
- Brain Icon – Enable or disable the Brain icon displayed on your storefront.
These settings help personalize your store and ensure it provides the right experience for your customers.
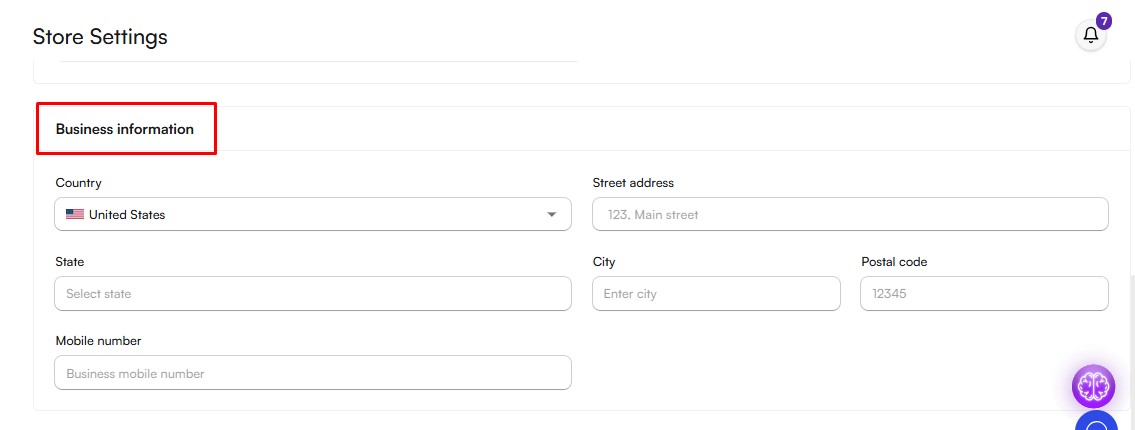
- Business Information
The Business Information section allows you to add and manage your business details, helping customers learn more about your brand and build trust in your store.
You can update the following information:
- Country
- Address
- Postcode
- Phone Number
Keeping your business information accurate and up to date helps provide customers with the correct contact and location details.
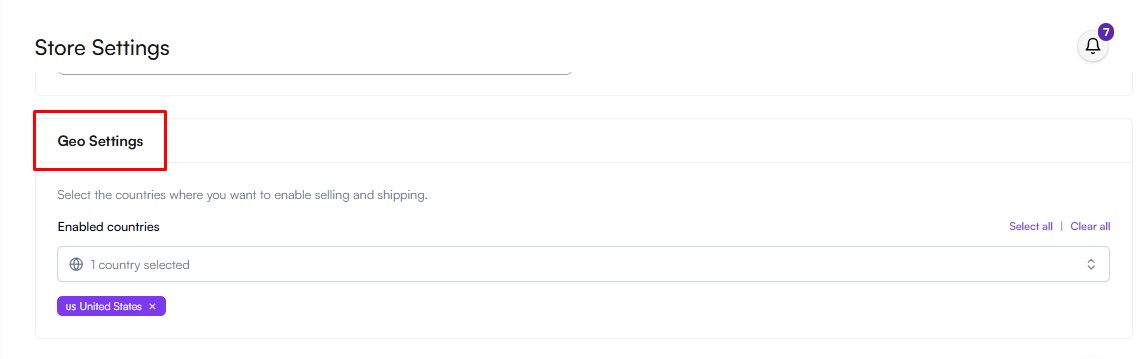
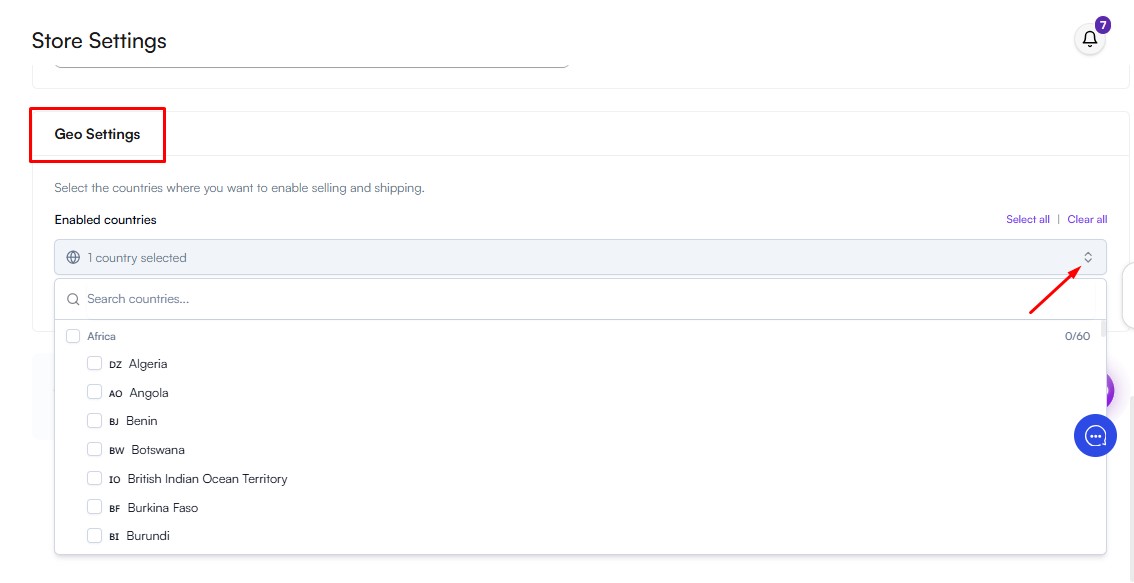
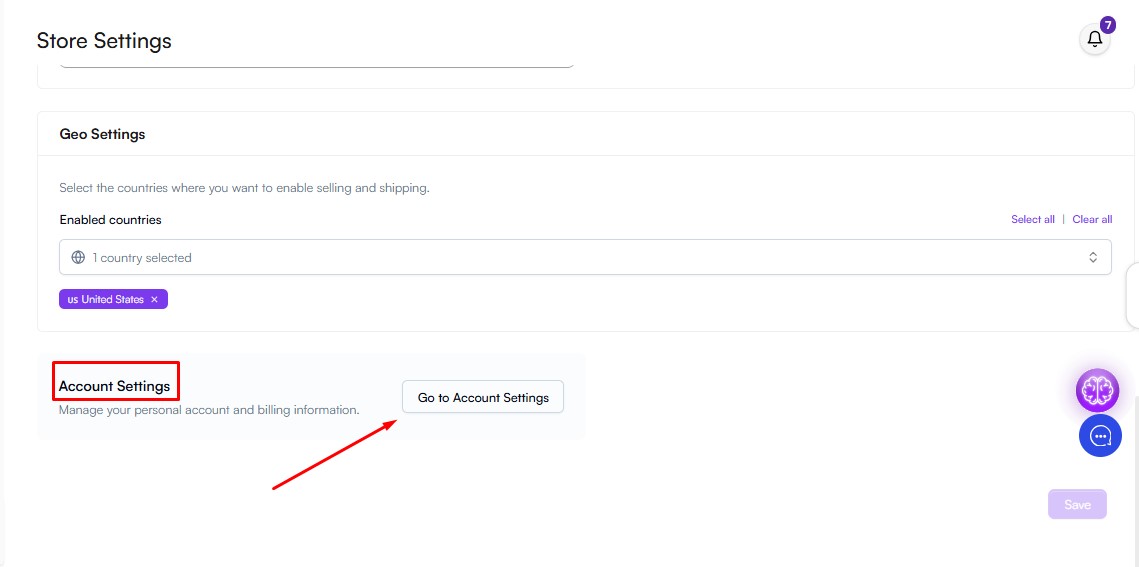
- Geo Settings
Choose the countries where your store operates. You can specify where you want to:
- Sell your products
- Offer shipping services
These settings determine the regions where customers can place orders from your store.
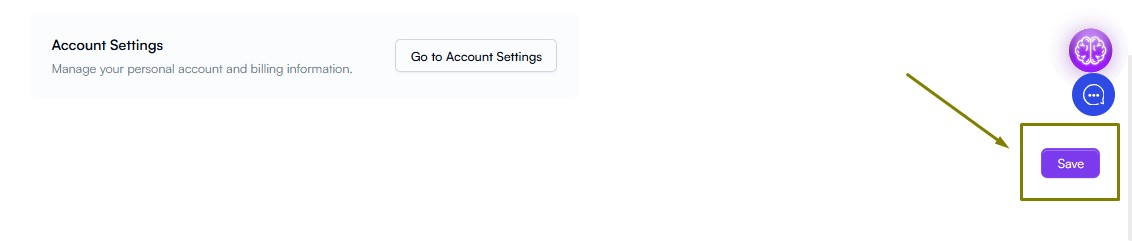
Important: After making changes in the General tab, scroll to the bottom of the page and click Save to apply your updates.
- Account Settings
The Account Settings section allows you to manage your account information and subscription details. It is divided into two main areas: Profile and Billing.
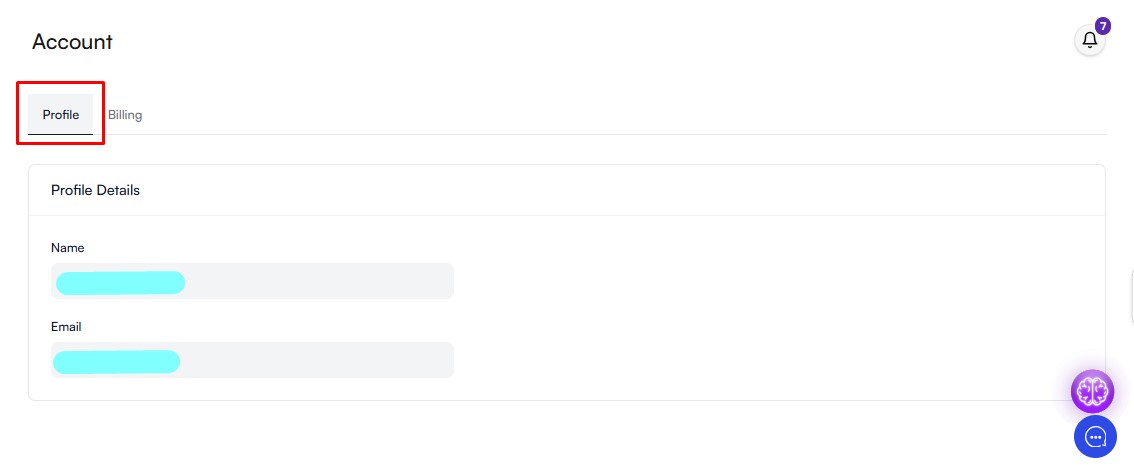
- Profile
The Profile section displays the personal information associated with your OpoShop account, including:
- Name
- Email Address
Note: Your name and email address cannot be updated from the Profile section. If you need to change either of these details, please contact our Customer Support team at hello@everbee.io for assistance.
- Billing
The Billing section provides everything you need to manage your subscription and payment information.
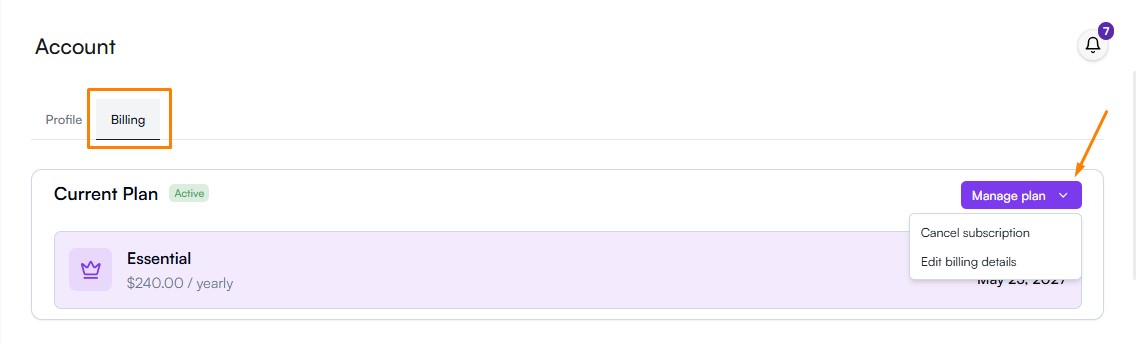
- Current Plan
View your current subscription plan and manage your subscription.
From here, you can:
- View your active plan
- Edit your subscription billing details
- Cancel your subscription by clicking Manage Plan
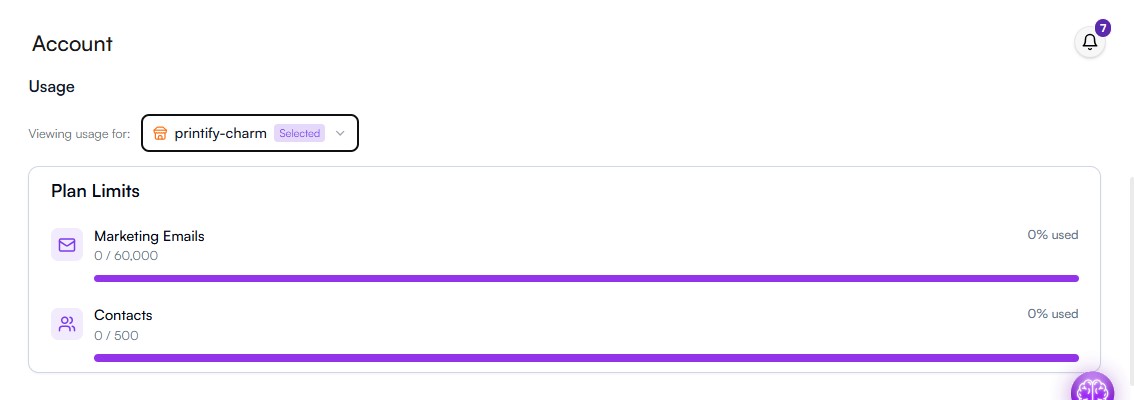
- Usage
Monitor your current plan limits, including:
- Marketing Emails and Contacts
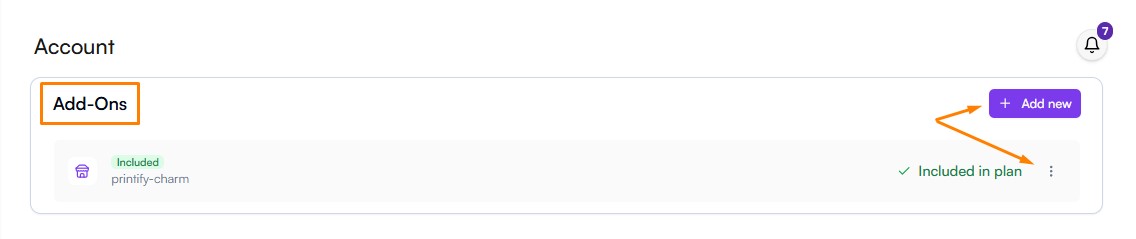
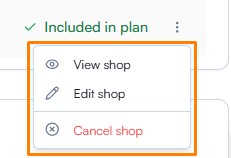
- Add-Ons
Manage your connected shops and third-party integrations.
From here, you can:
- Access connected accounts (such as Etsy and Printify)
- Add or create a new shop
- Review or edit shop details
- Cancel your shop
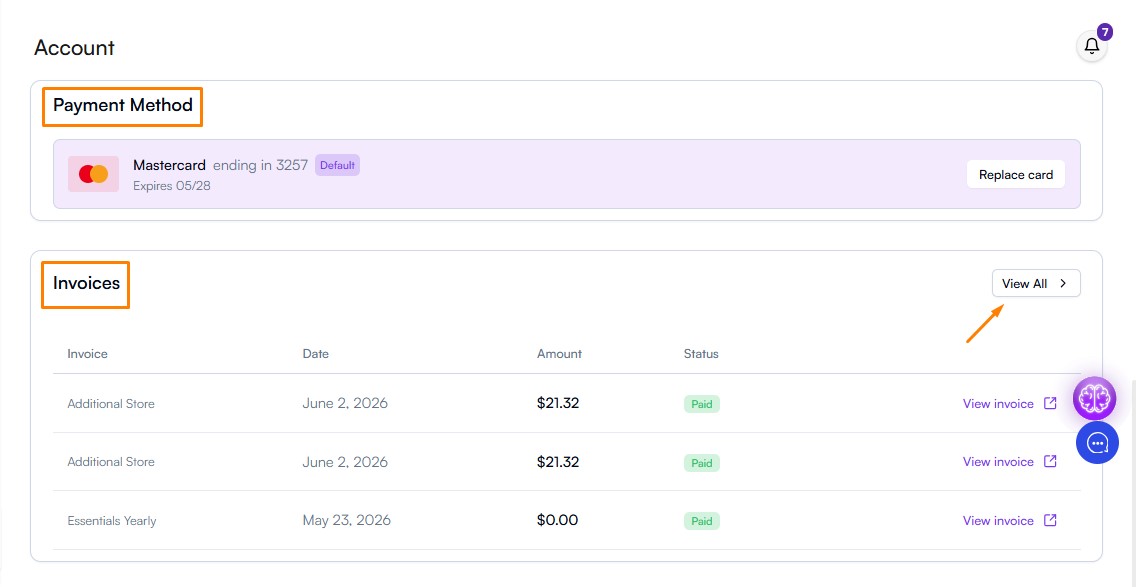
- Payment Method
Manage your billing and payment information, including:
- Check your current payment method
- Replace the payment card
- Access previous invoices
Domain
The Domain section lets you set your store's web address. You can either use your default OpoShop subdomain or connect a custom domain that you already own.
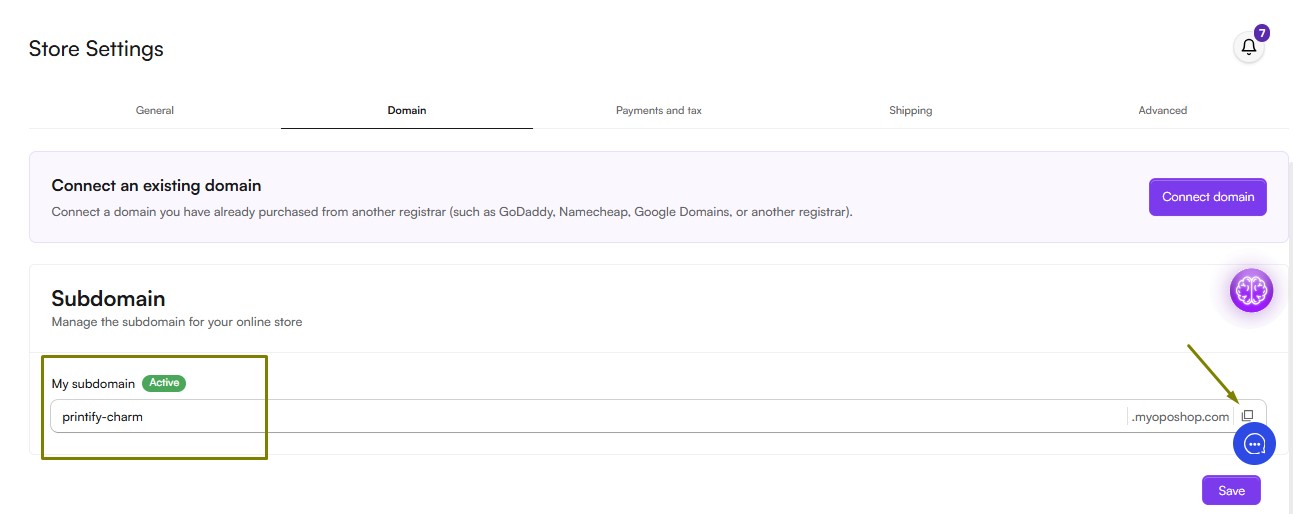
- Subdomain
Every OpoShop store is assigned a default subdomain in the following format: yourstorename.myoposhop.com
From this section, you can:
- View your current subdomain
- Copy or edit your subdomain
- After making any changes, click Save to apply your updates.
Note: When entering a subdomain, use only lowercase letters and numbers.
- Connecting an Existing Domain
If you already own a domain purchased through a domain registrar (such as GoDaddy, Namecheap, Google Domains, or another provider), you can connect it to your OpoShop store.
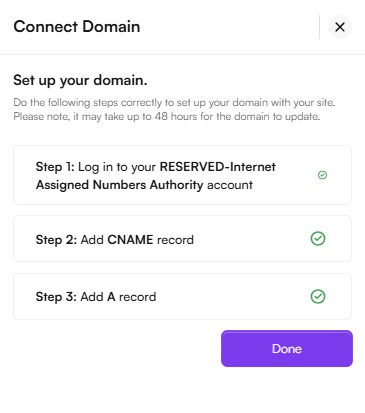
To connect your domain:
- Enter the domain you already own.
- OpoShop will automatically detect your domain provider.
- Follow the on-screen instructions to connect your domain to your OpoShop store.
- Log in to your domain provider's DNS management page and add the CNAME and A @ records exactly as shown in OpoShop.
Important: DNS changes can take up to 48 hours to propagate worldwide. If you've recently updated your DNS records, please allow time for the changes to take effect before checking the connection status again.

 DNS Record Status
Once your DNS records have been added, you can monitor their status from the Domain dashboard. The DNS status table displays:
- Expected Value – The DNS record values required by OpoShop.
- Current Value – The values currently detected for your domain.
- Status – Indicates whether each record has been configured correctly.
When the Expected Value and Current Value match, the status will display Verified. If they do not match, the status will display Not Verified, indicating that the DNS record still needs to be updated or has not yet finished propagating.
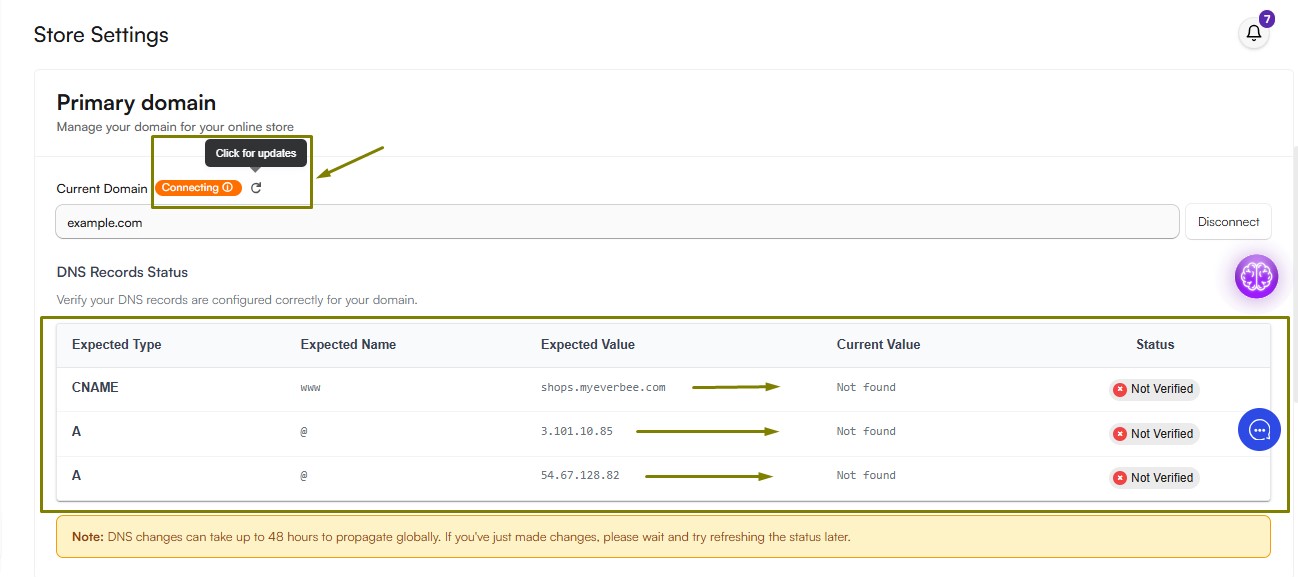
- Check Connection Status
If your Current Domain status displays Connecting, you can click Check for Updates to verify whether your DNS changes have propagated.
Note: This will only work if you have correctly added the required CNAME and A (@) records to your domain provider's DNS settings.
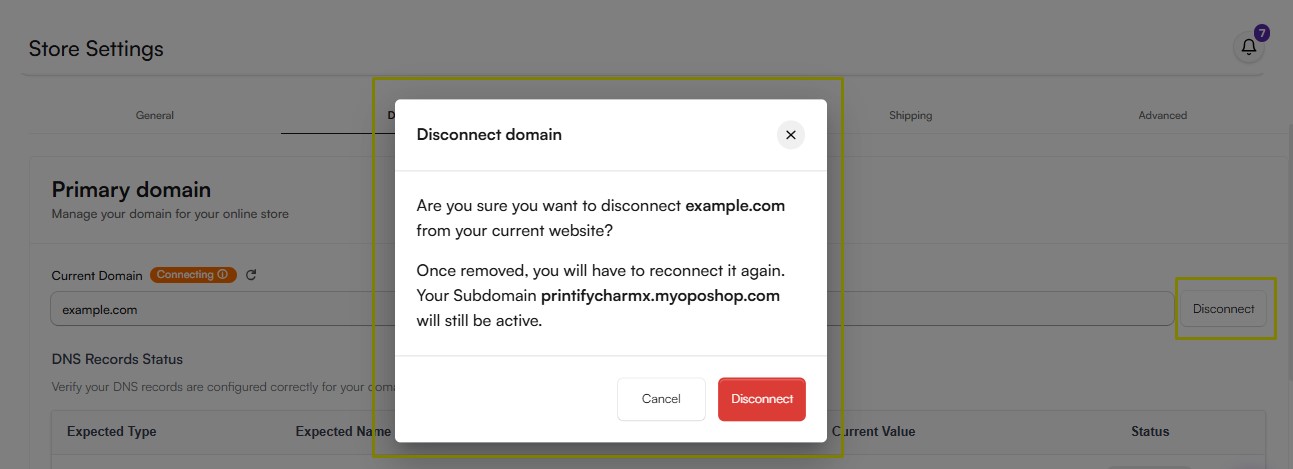
- Updating Your Domain Settings
If you need to make changes to your domain's DNS records after starting the connection process, we recommend disconnecting the custom domain from your OpoShop store first.
Once you've updated the DNS records with your domain provider, reconnect the domain in OpoShop and complete the setup process again. This helps ensure your domain is verified correctly and avoids potential connection issues.
Payment & Tax
The Payment & Tax section lets you configure how your store accepts payments and handles taxes. OpoShop currently supports integrations with Stripe and PayPal.
Note: OpoShop charges a 2.0% transaction fee on the total amount of every successful order, regardless of the payment gateway used.
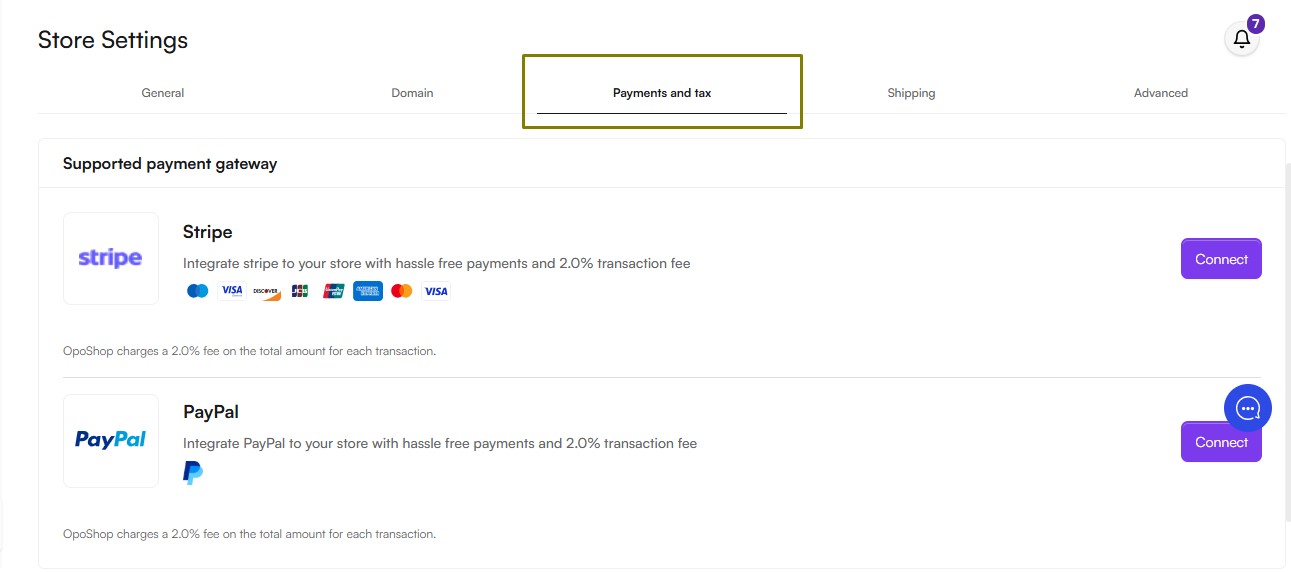
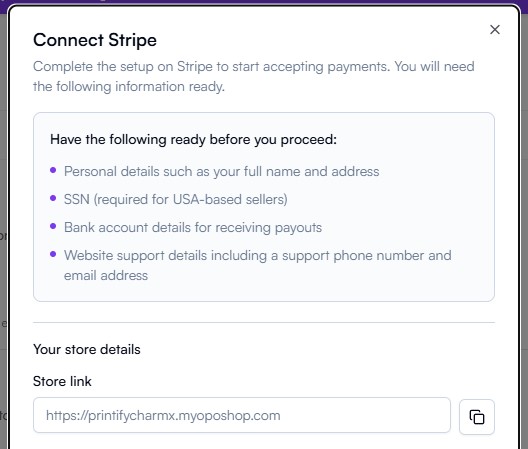
- Connect Stripe
To connect your Stripe account, click Proceed to Stripe and complete the onboarding process.
Before you begin, have the following information ready:
- Personal Details
- SSN (required for US-based sellers)
- Bank account details
- Website Support Information
- Email address
- Phone number
- Store URL
- Site name
- Store description
Tip: You can quickly copy your store information by clicking the Copy button on the Connect Stripe instructions screen before selecting Proceed to Stripe.


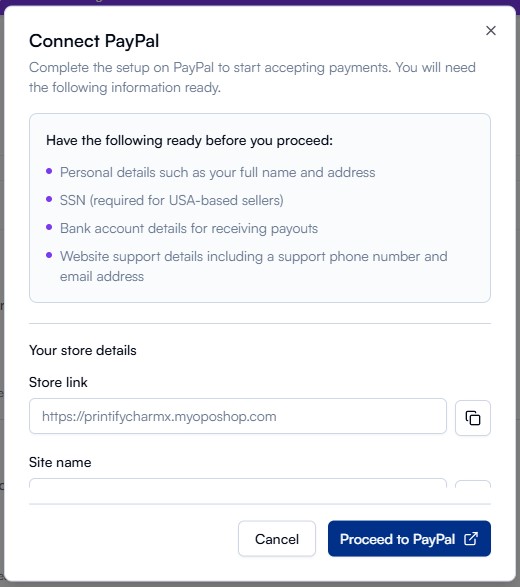
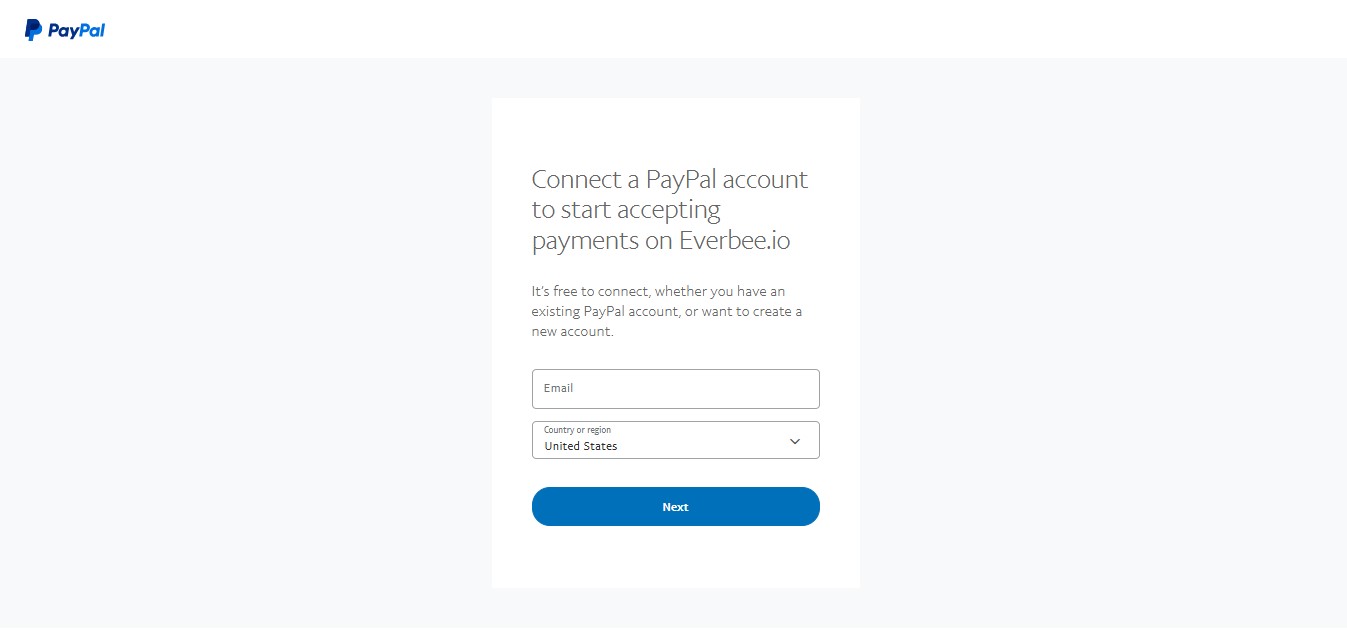
- Connect PayPal
To connect your PayPal account, click Proceed to PayPal and complete the setup process.
Tip: Your store information is available on the Connect PayPal instructions screen. Use the Copy button to copy the required details before selecting Proceed to PayPal.
Once your payment gateway has been successfully connected, your store will be ready to securely accept customer payments.
Shipping
The Shipping section allows you to configure your store's shipping options, including shipping profiles, shipping zones, and shipping rates, to ensure a smooth delivery experience for your customers.
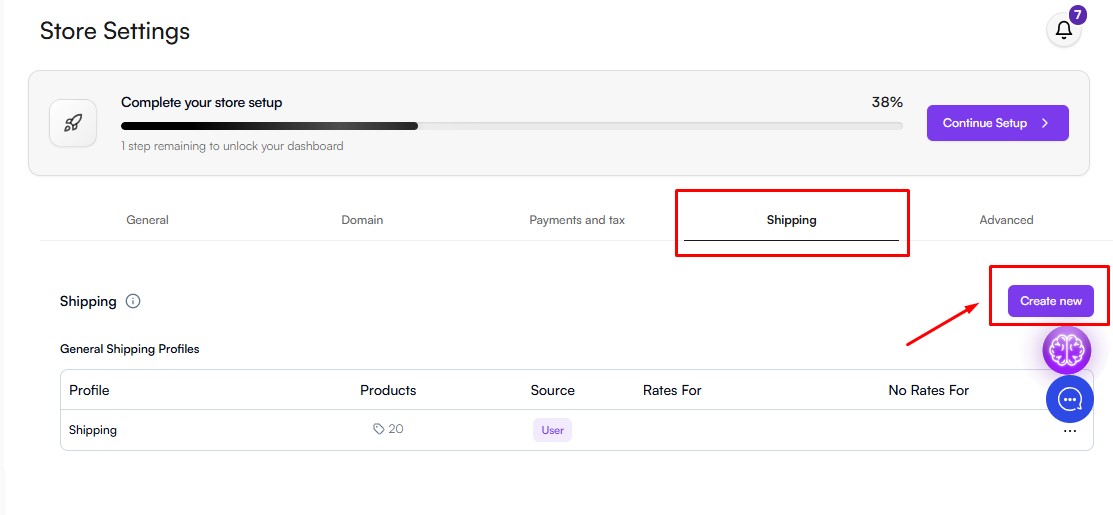
- Shipping Profiles
Shipping profiles let you organize products and assign specific shipping rules based on where they are fulfilled.
When creating a shipping profile, you'll configure:
- Profile Name – An internal name for the shipping profile. This is not visible to customers.
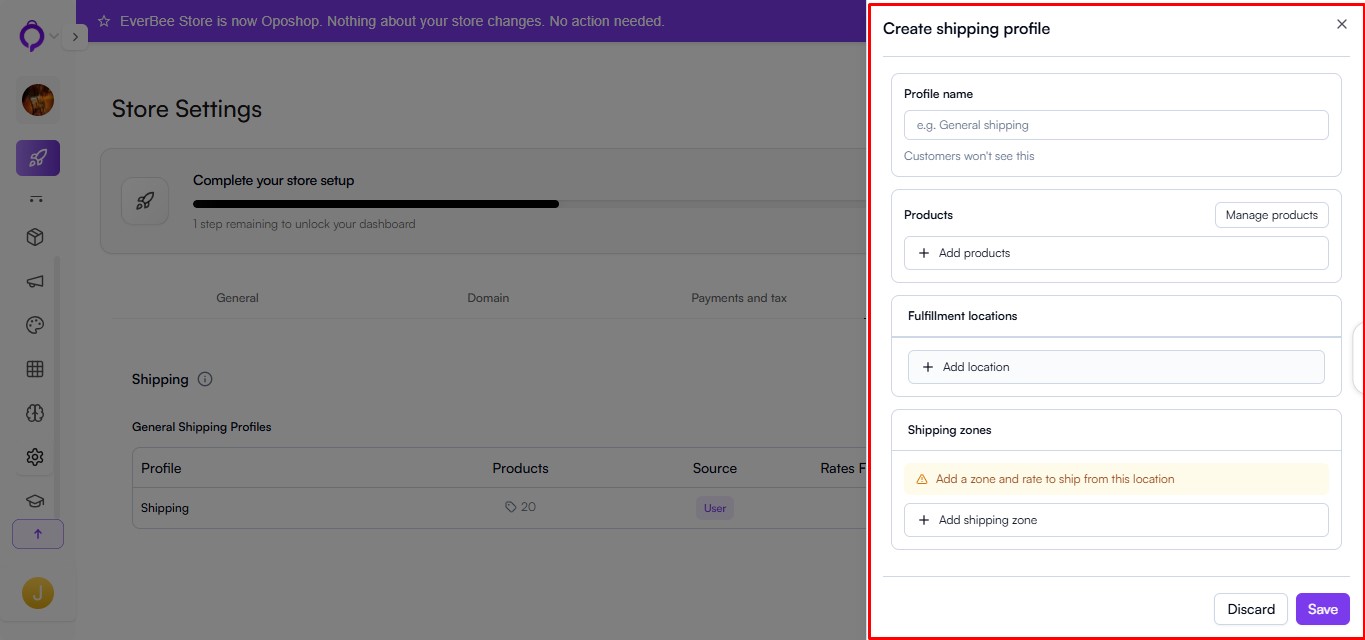
- Products – Select the products that will use this shipping profile.
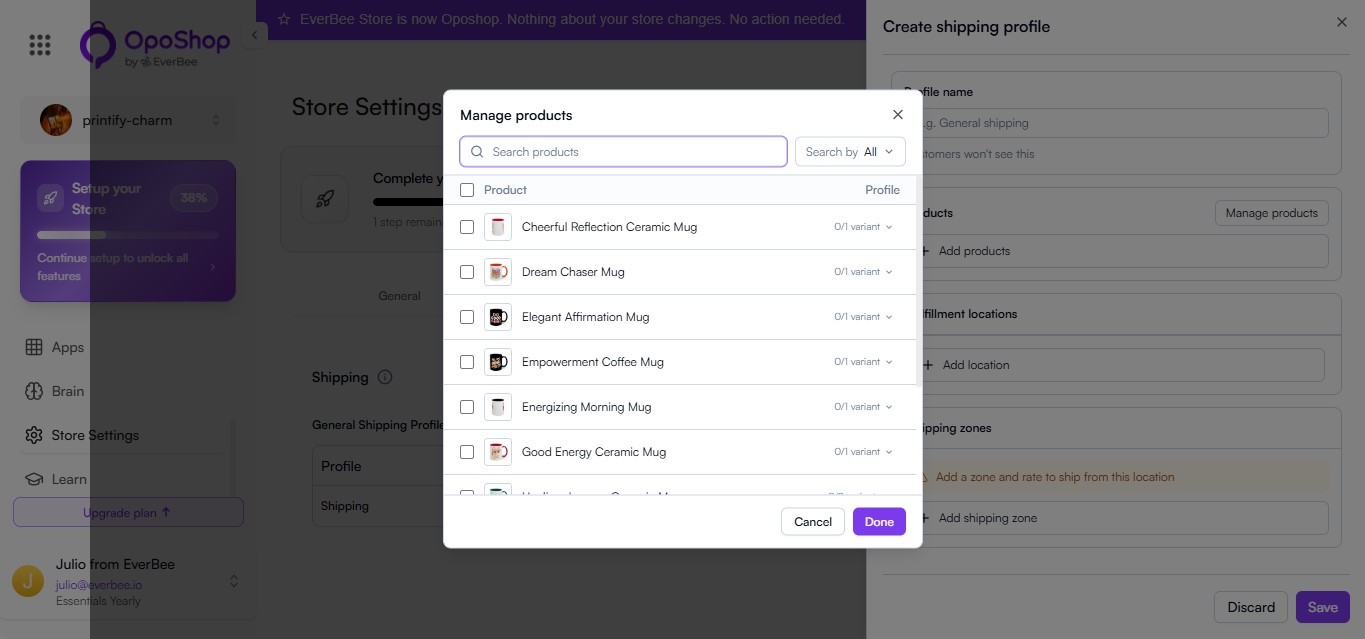
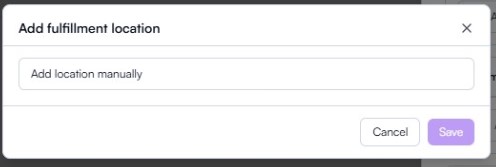
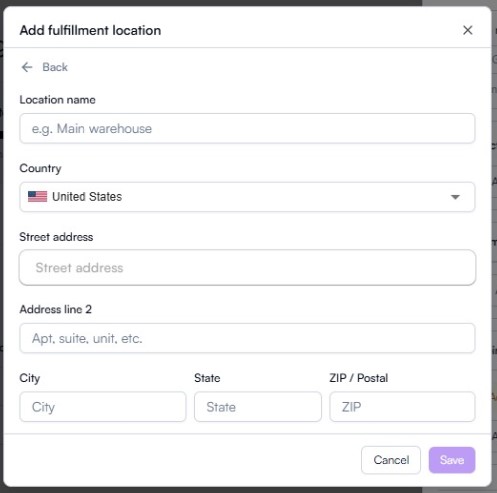
- Fulfillment Locations – Choose the location from which the selected products will be shipped.
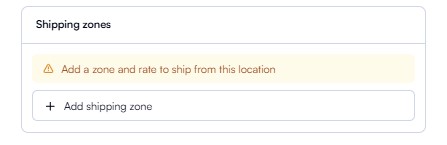
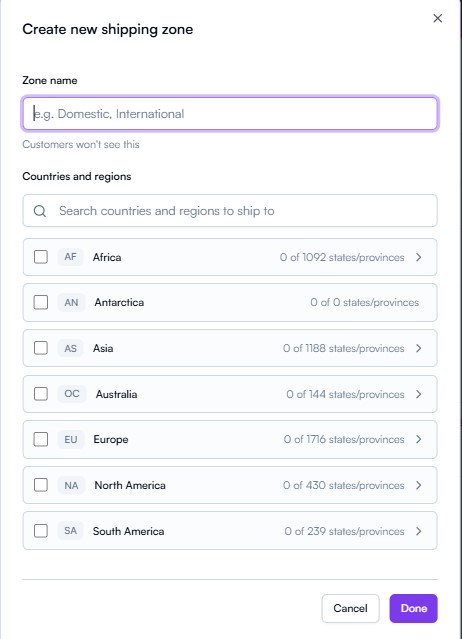
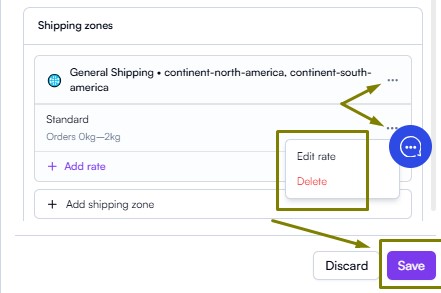
- Shipping Zones
Shipping zones define the countries or regions where you ship products.
When creating a shipping zone, you'll specify:
- Zone Name – An internal name for the shipping zone. (This is not visible to customers.)
- Countries and Regions – Select the destinations included in the shipping zone.
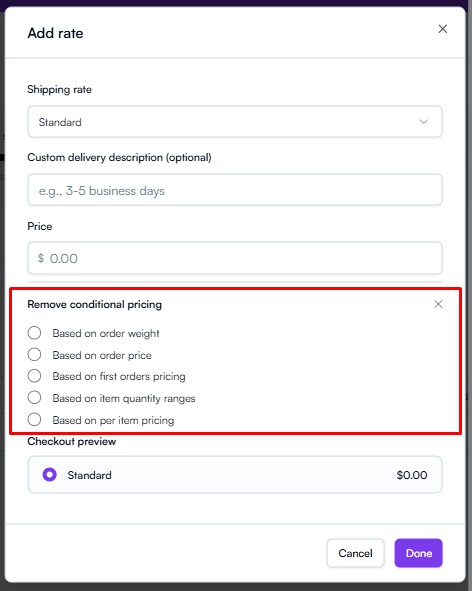
- Shipping Rates
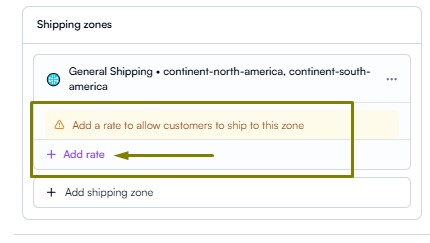
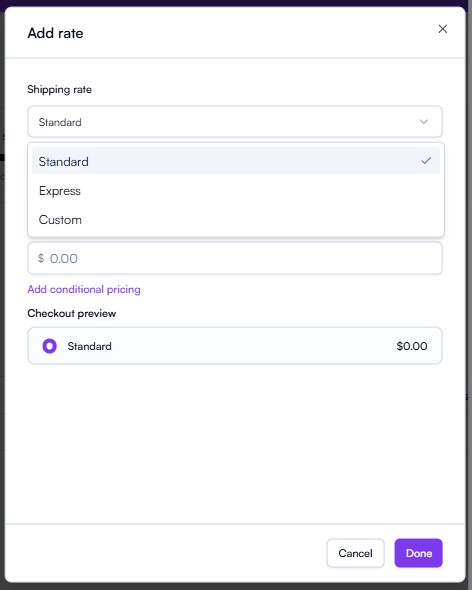
Each shipping zone can include multiple shipping rates. You can choose from the following rate types:
- Standard
- Express
- Custom
For each shipping rate, you can configure:
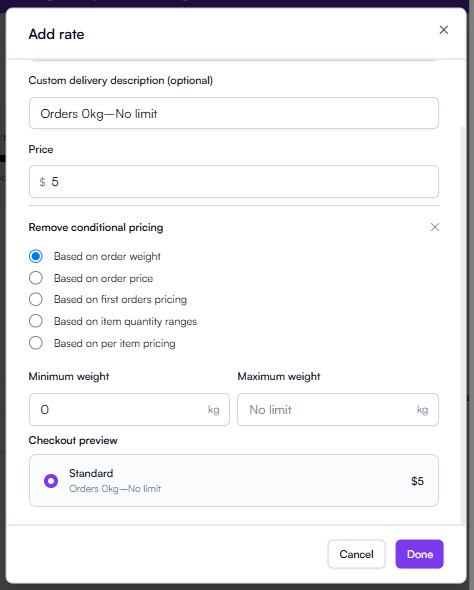
- Custom Delivery Description(optional) – Display an estimated delivery timeframe, such as 3–5 business days.
- Price – Set a fixed shipping cost or configure conditional pricing.
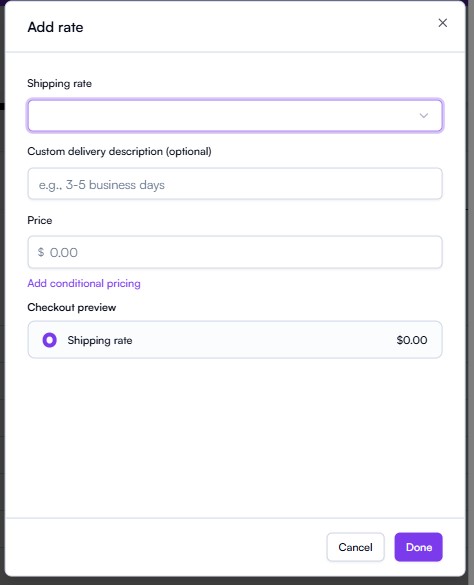
- Conditional Pricing
You can automatically adjust shipping costs based on one or more of the following conditions:
- Order weight
- Order price
- First-order pricing
- Item quantity ranges
- Per-item pricing
Using shipping profiles, zones, and conditional rates allows you to create flexible shipping rules tailored to your products and delivery destinations.
Important: You can edit or delete any shipping Zone or Rate by clicking the three-dot (⋮) menu next to it. After making your changes, scroll to the bottom of the page and click Save to apply your updates.
Advanced
The Advanced tab provides access to tools for integrating third-party services and adding custom functionality to your OpoShop store.
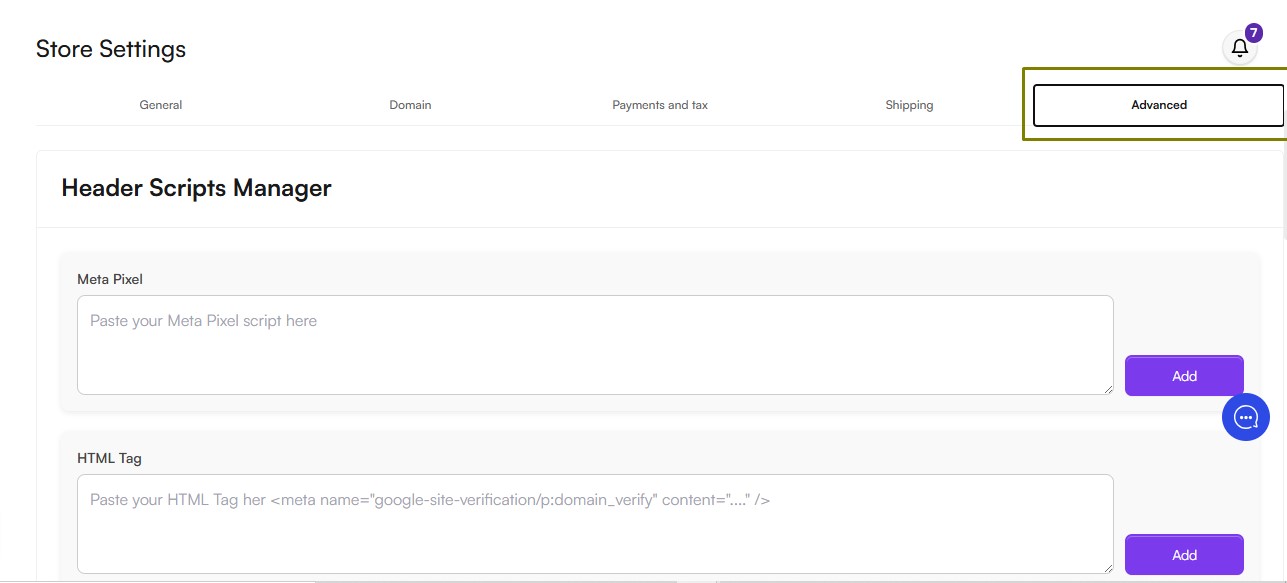
- Header Scripts Manager
The Header Scripts Manager allows you to add scripts to your website's <head> section for analytics, tracking, marketing, and other custom integrations.
Supported integrations include:
- Meta Pixel
- HTML Tag
- Google Tag Manager
- Google Analytics
- Hotjar
- Custom Script
Learn More: For detailed instructions on setting up and managing these integrations, see our How to Add the Script to Your Website article.