Use the Products page to add new products or manage existing ones, including updating prices, variants, and availability.
- Go to the Products section from the main menu.
- Your existing products will be listed here. If no products have been added yet, the list will be empty.
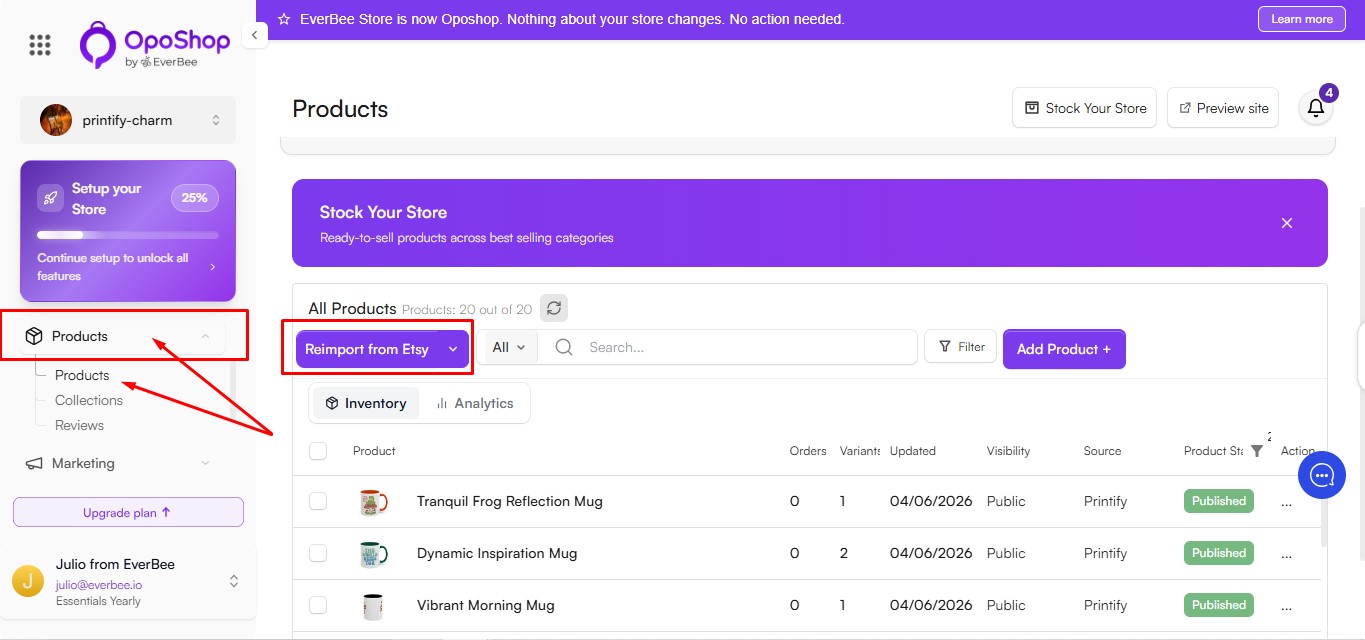
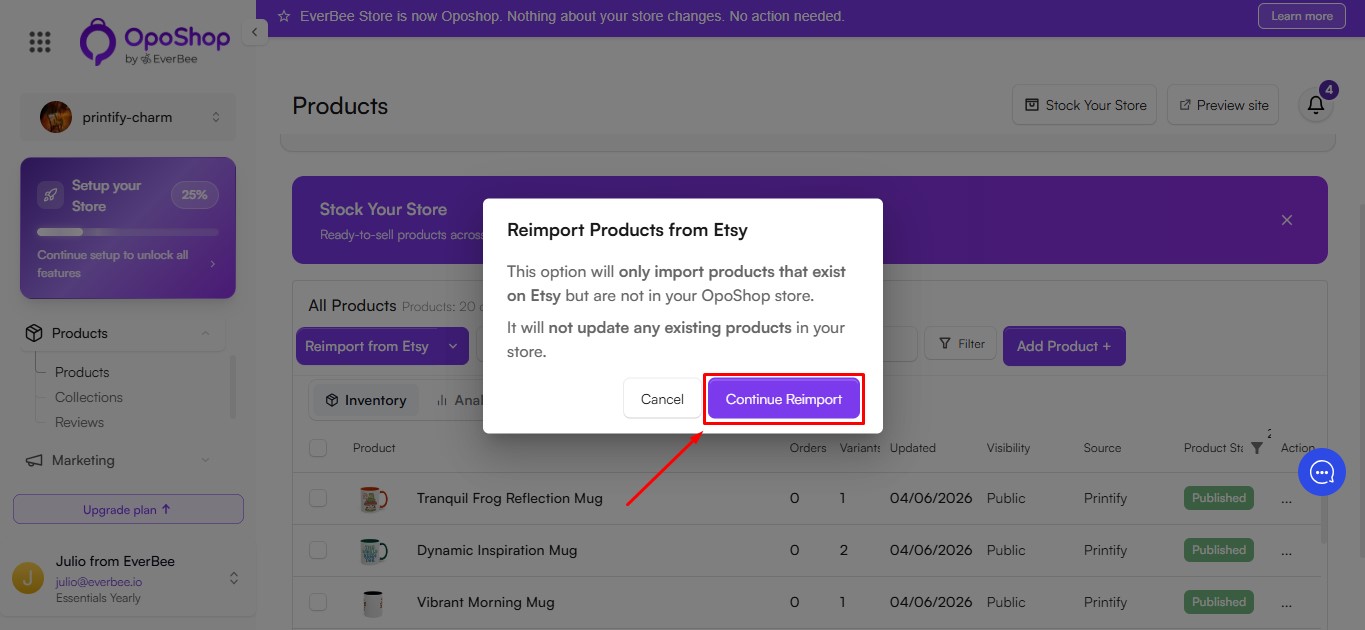
- If your store is connected to Etsy, use Reimport from Etsy to import products that are available on Etsy but missing from your OpoShop store.
- This option does not update existing products.
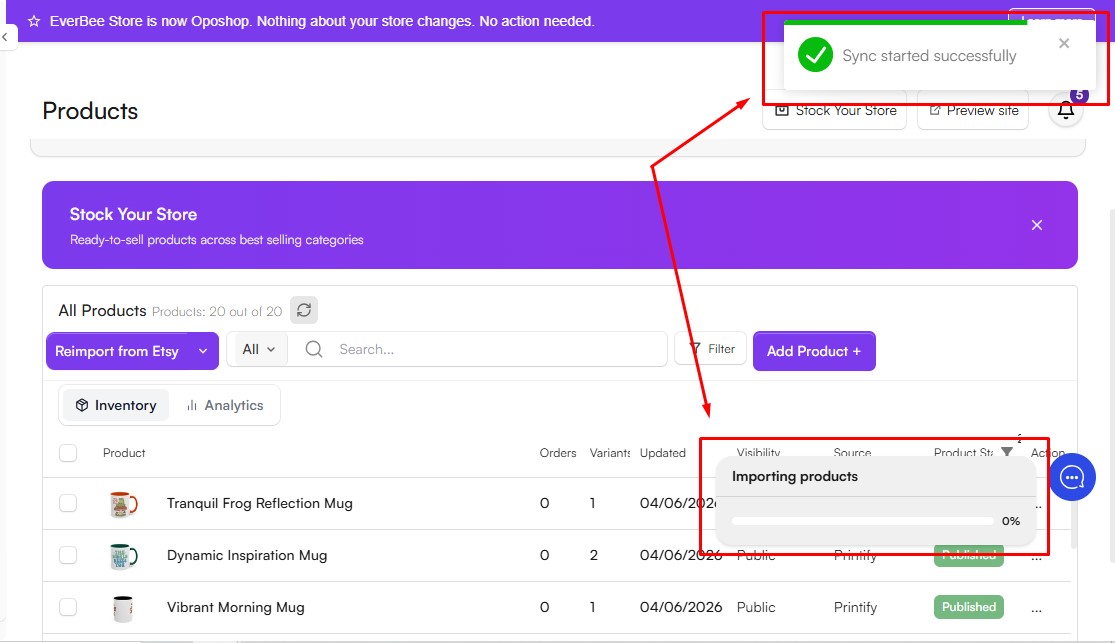
- A confirmation message and progress bar will appear when the import process begins.
- Adding New Products
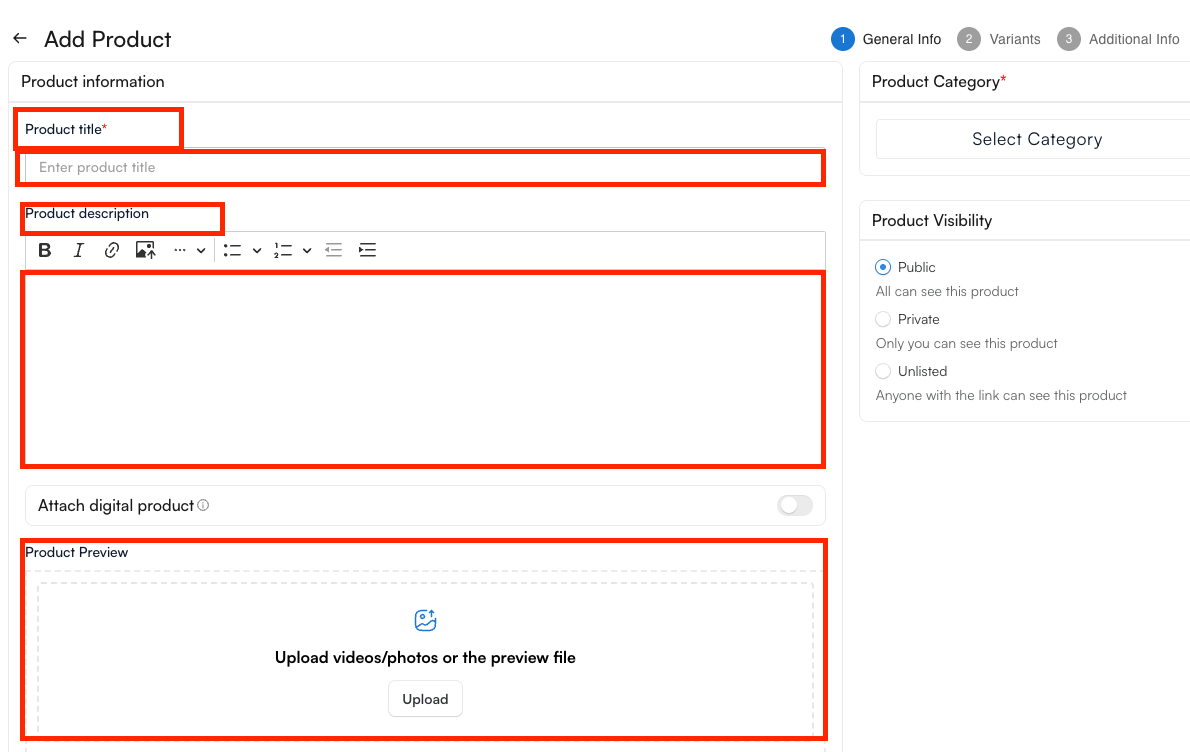
- Click on the Add Product+ button in the top right corner to begin. Here, you need to insert all your product information, which includes:
- Product Title (Mandatory): Enter a clear and descriptive product name.
- Description: Provide details about the product. You can format the text, add images, and use bullet points.
- Product Preview: Upload up to 12 images or videos to showcase your product.
Note: Turn on the toggle in the top-right corner for digital products first.
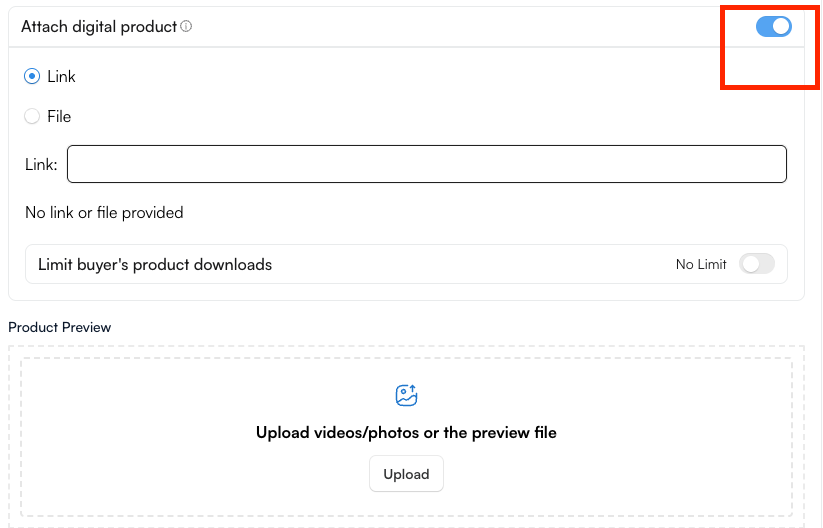
- You can add either a file upload or a download link to a digital product, but not both at the same time. To switch between options, remove the existing file or link first.
- For digital products, Track Quantity is turned off by default. This way, you can control the number of downloads.

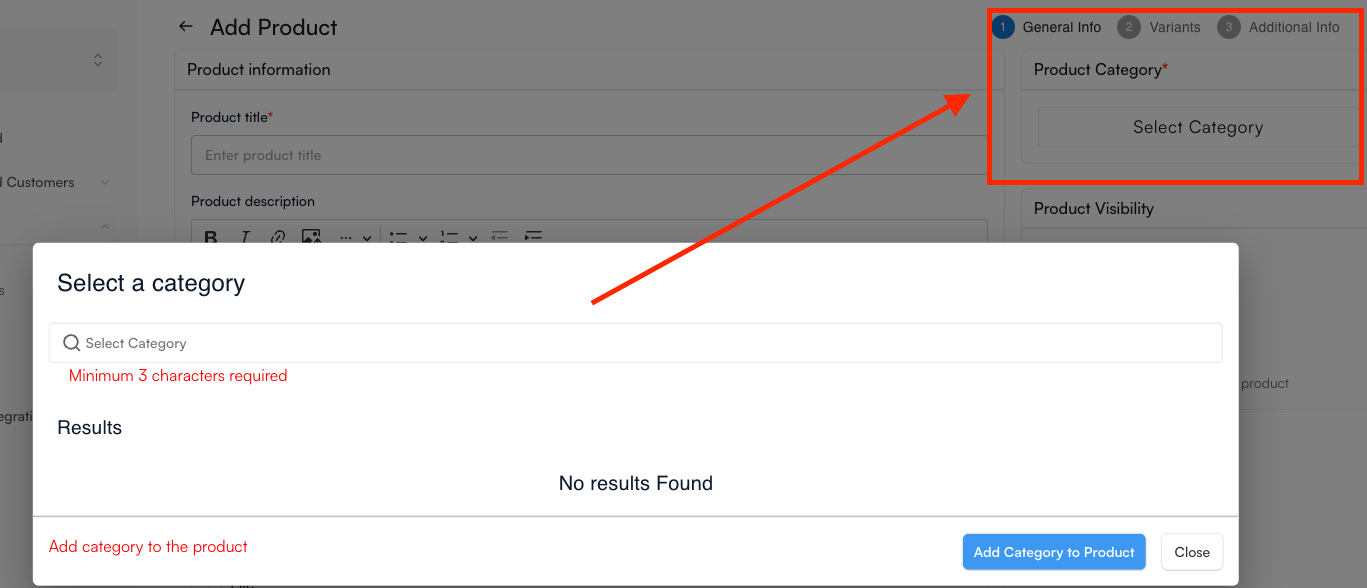
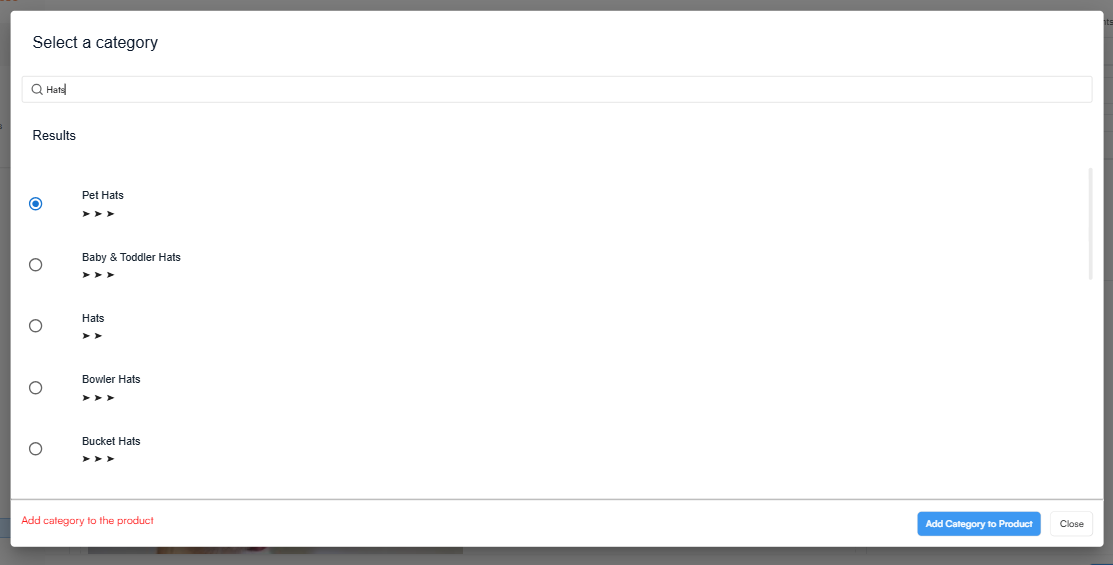
- Product Category
- Start typing the product category name by typing a minimum of 3 characters.
- Relevant results will appear automatically, and you can select the category that best matches your store's style and offerings.
- Then, click on the Add Category to the product button. You can change this anytime, as well.
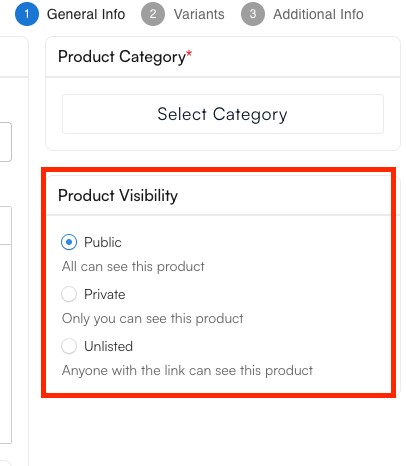
- Product Visibility
- Choose the visibility setting that best fits your needs:
- Public: Visible to all visitors and available for purchase.
- Private: Visible only to you and hidden from customers.
- Unlisted: Not published in your store and inaccessible to customers.
- Adding Product Variants
- To offer different versions of the same product, enable the Variants toggle.
- Variants allow customers to choose between options such as different sizes, colors, styles, or other product attributes. For example, a shirt may be available in multiple colors and sizes.
You can choose from the following variant types:
- Size
- Colour
- Material
- Style
- Customize Yours
To add variant values, enter a value in the field and press Enter. Repeat this process for each value you want to include.
If you need to change a variant type, simply remove the current selection. The variant menu will reappear, allowing you to choose a different option.
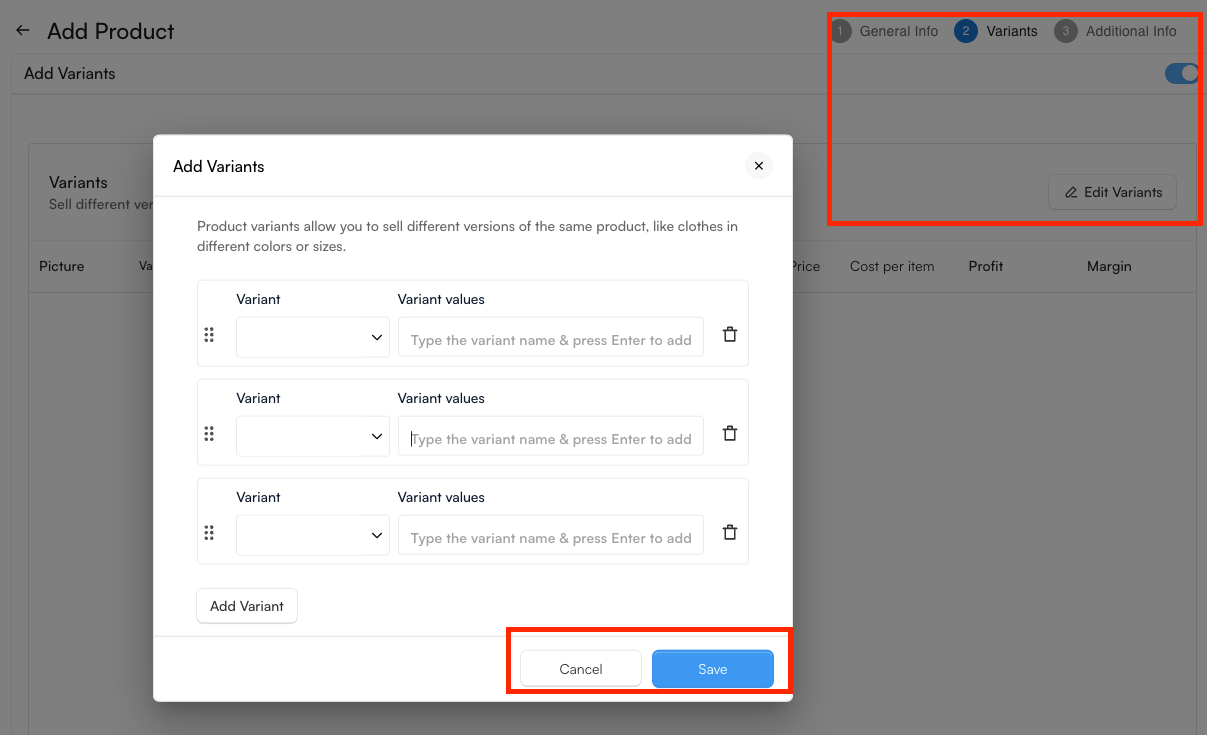
To change the order of your variants, simply drag and drop them into the desired position.

The variants of the products will then be displayed as a table, in which you can edit them:
- Picture
- Track Quantity (switch on or off)
- Available (its quantity)
- Current and Previous Price
- Cost Per Item
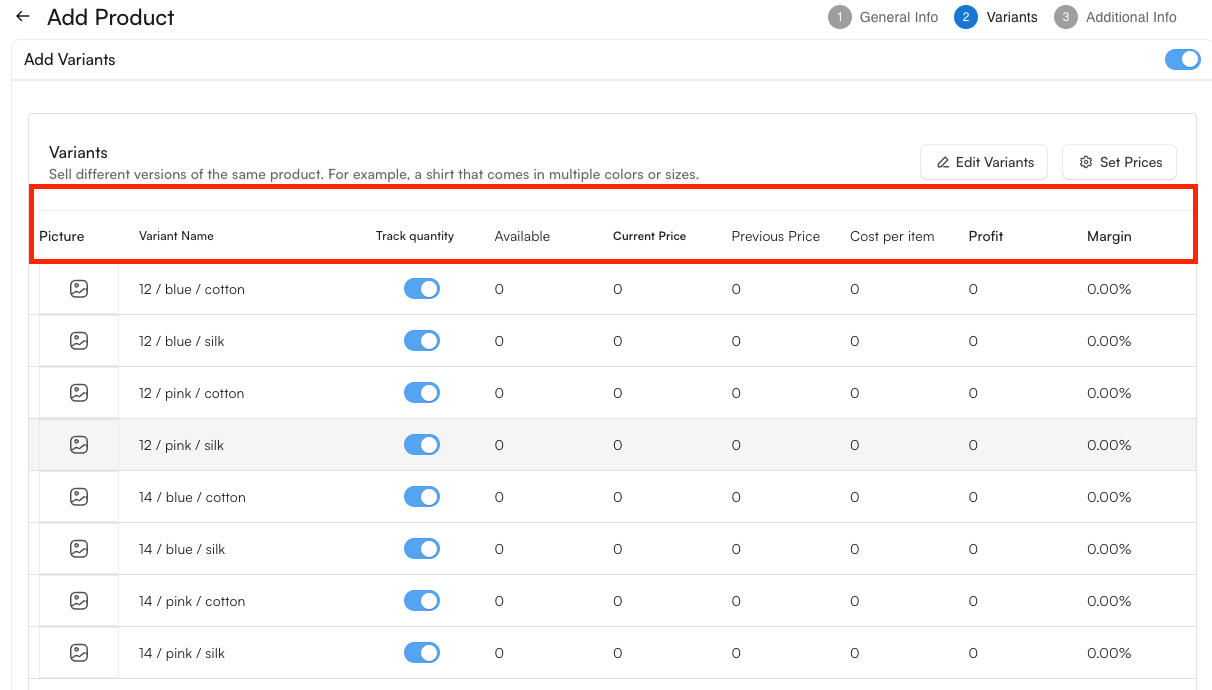
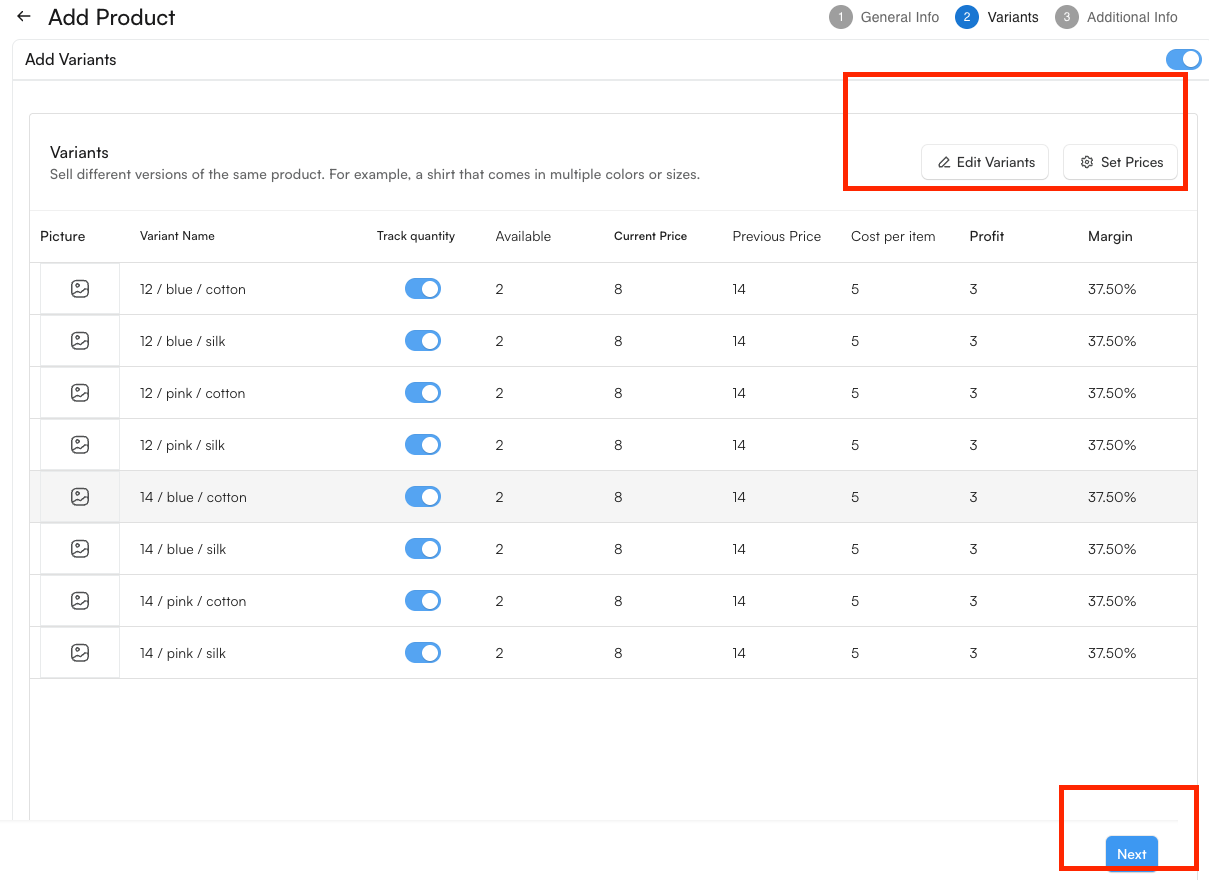
Additional details, such as Profit, Margin, and Delete, are available for each variant. You can also use the Apply All button to copy the settings from one variant to all others.
Once you've finished configuring your variants, click Save, then select Next at the bottom of the page to continue.
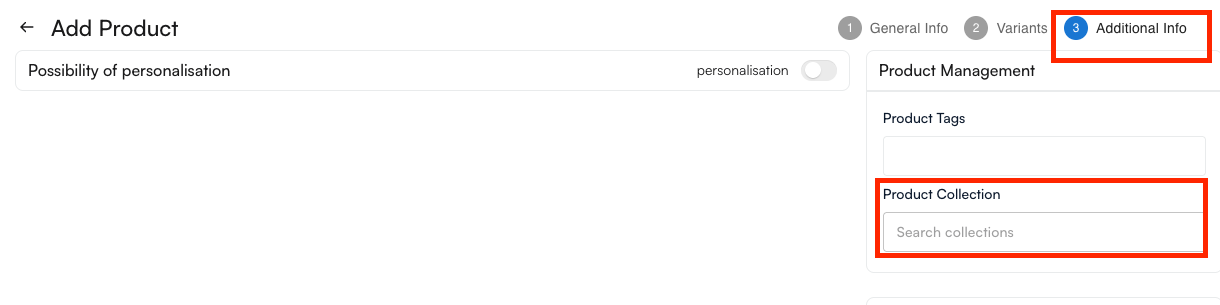
- Additional Information
- This is the final step in the product creation process.
- If you need to manage product details such as Tags or Collections, be sure to click Create Product first. Editing these settings before creating the product may cause any unsaved changes from the previous steps to be lost.
When you're ready, click Create Product to save your product.
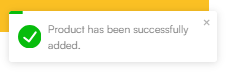
After the product is created successfully, a confirmation message will appear, and the product will be available in the Products tab.